Category Archives: kim-1
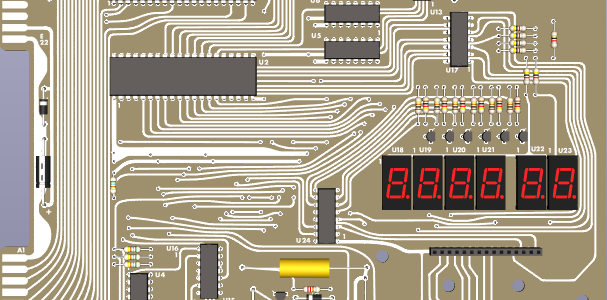
KIM-1 rev D PCB redesign Eduardo Casino
Eduardo Casino has designed with modern tools, like Kicad and image software Inkscape a PCB for the KIM-1 which is as close as he could get to a Rev D.
Based upon images on the Revisions pages on this site.
On this forum64.de thread he published the design, and made all available on his github pages.
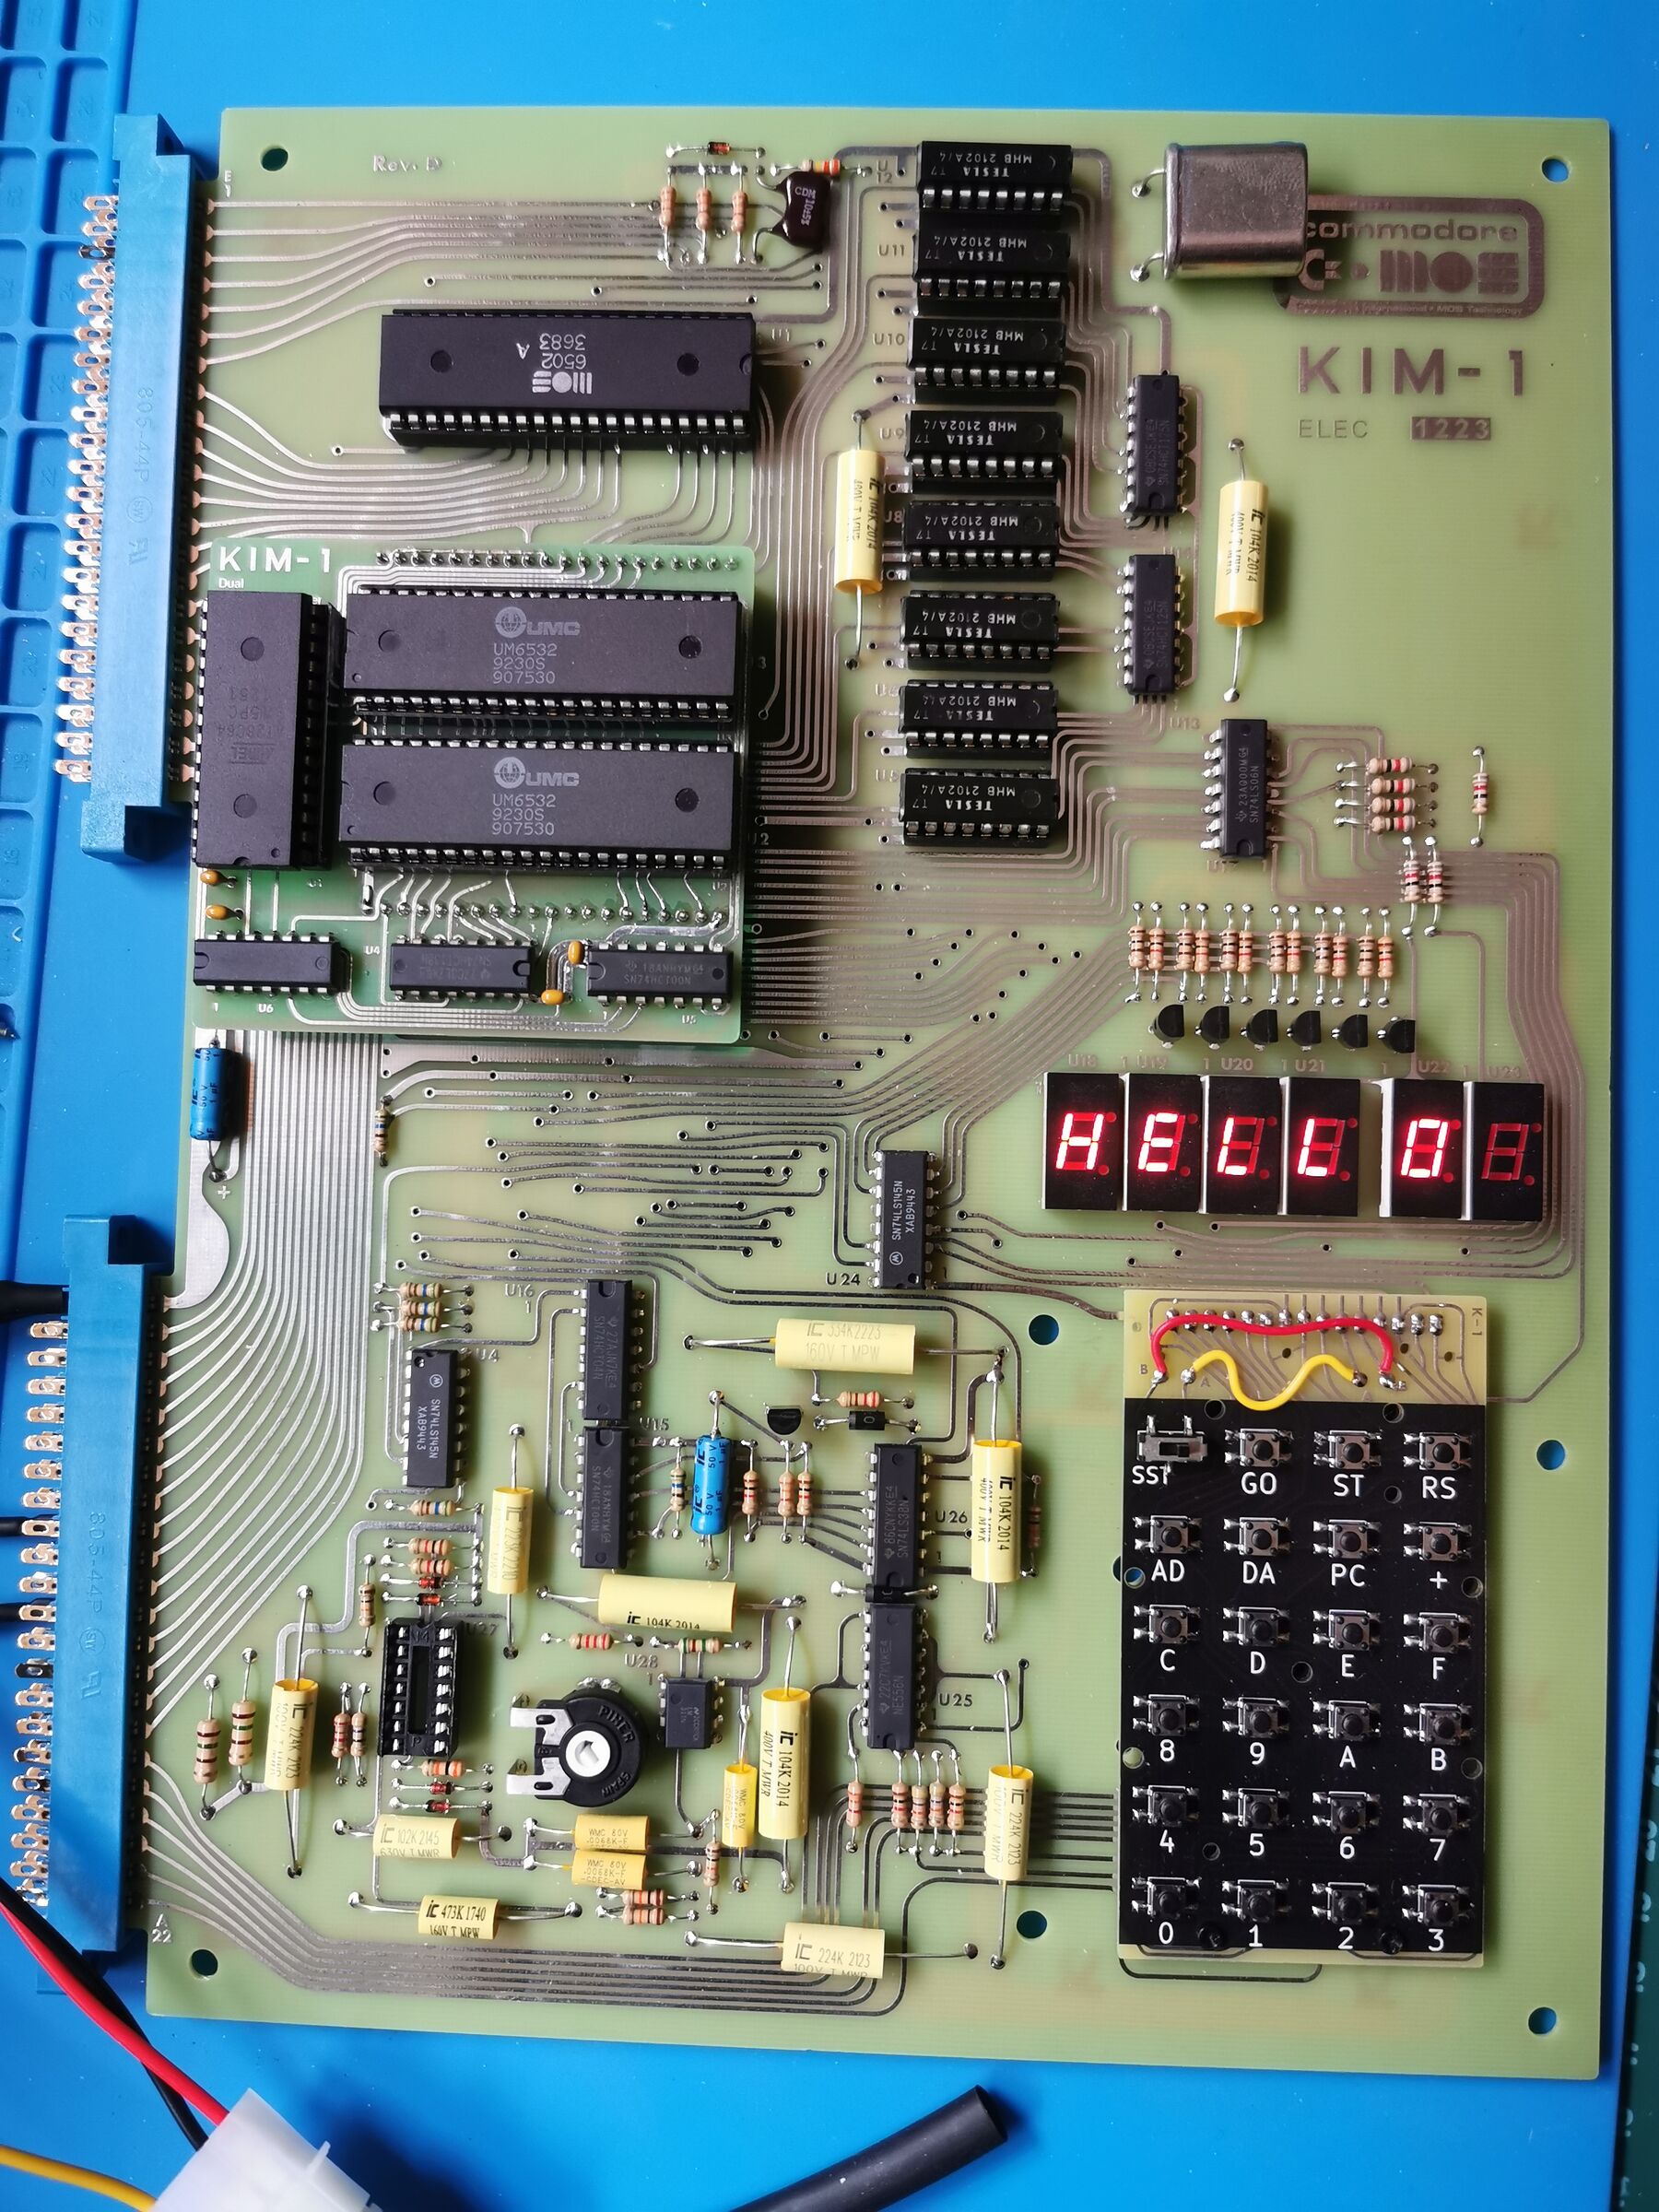
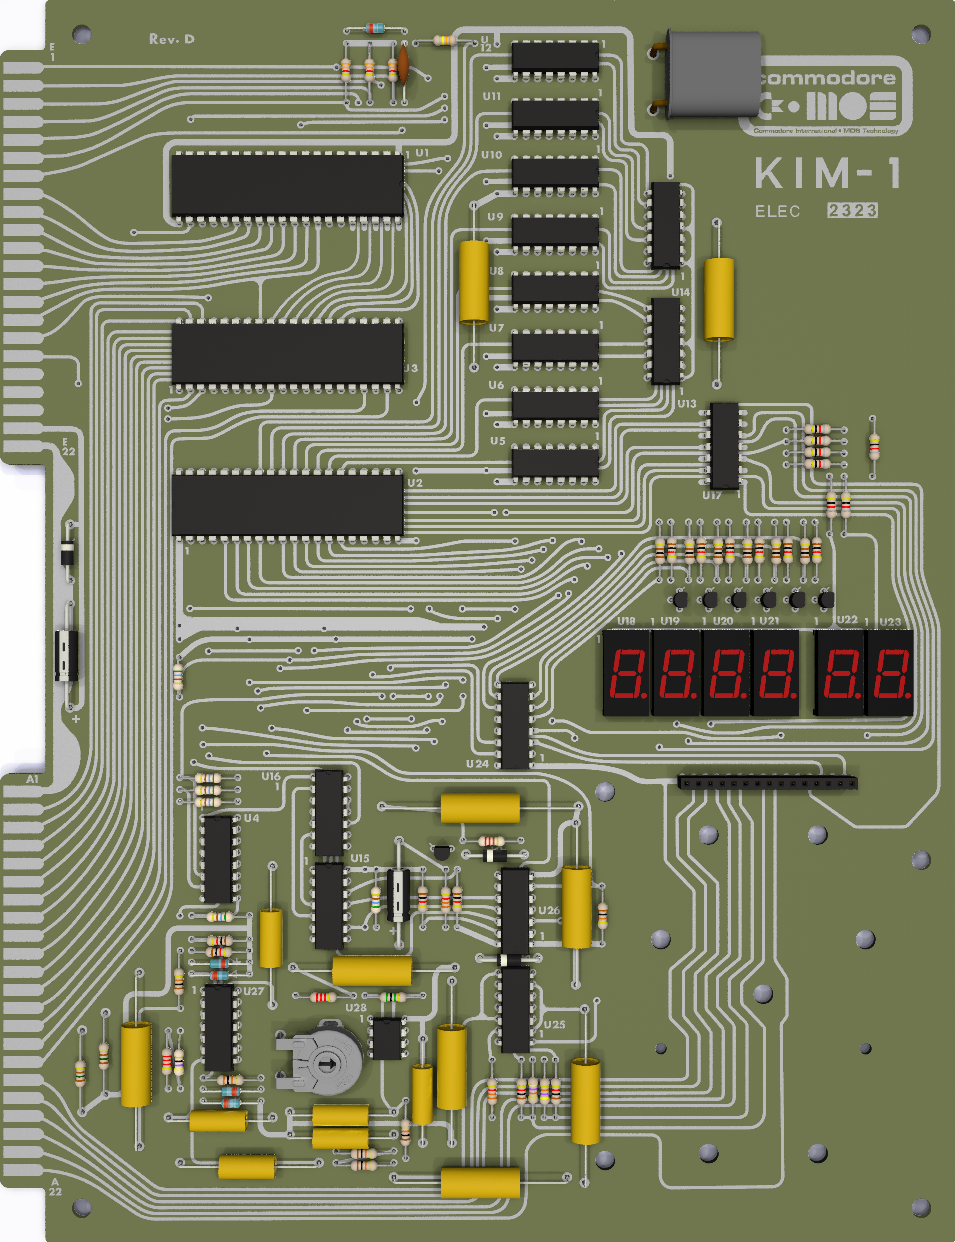
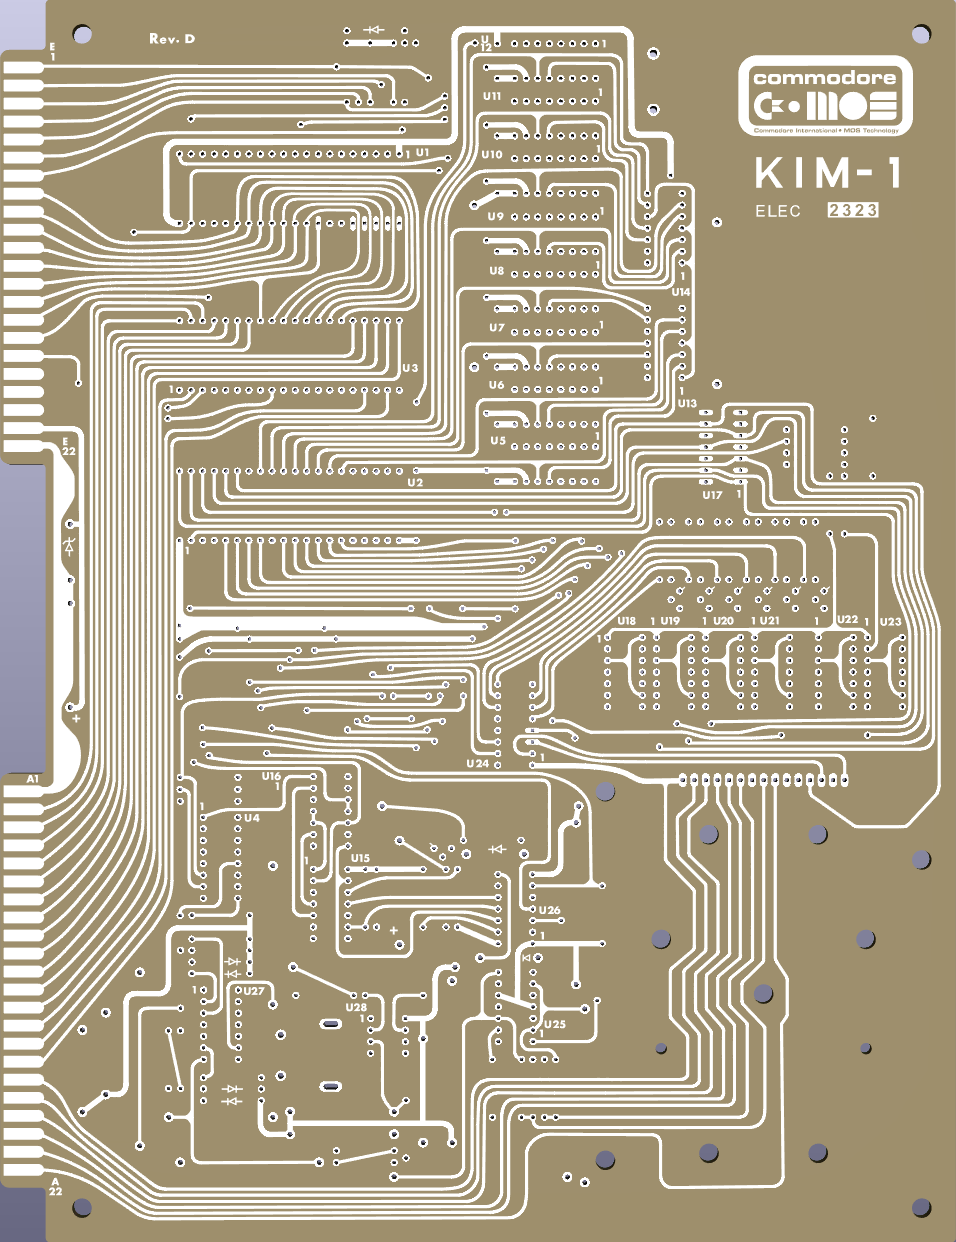
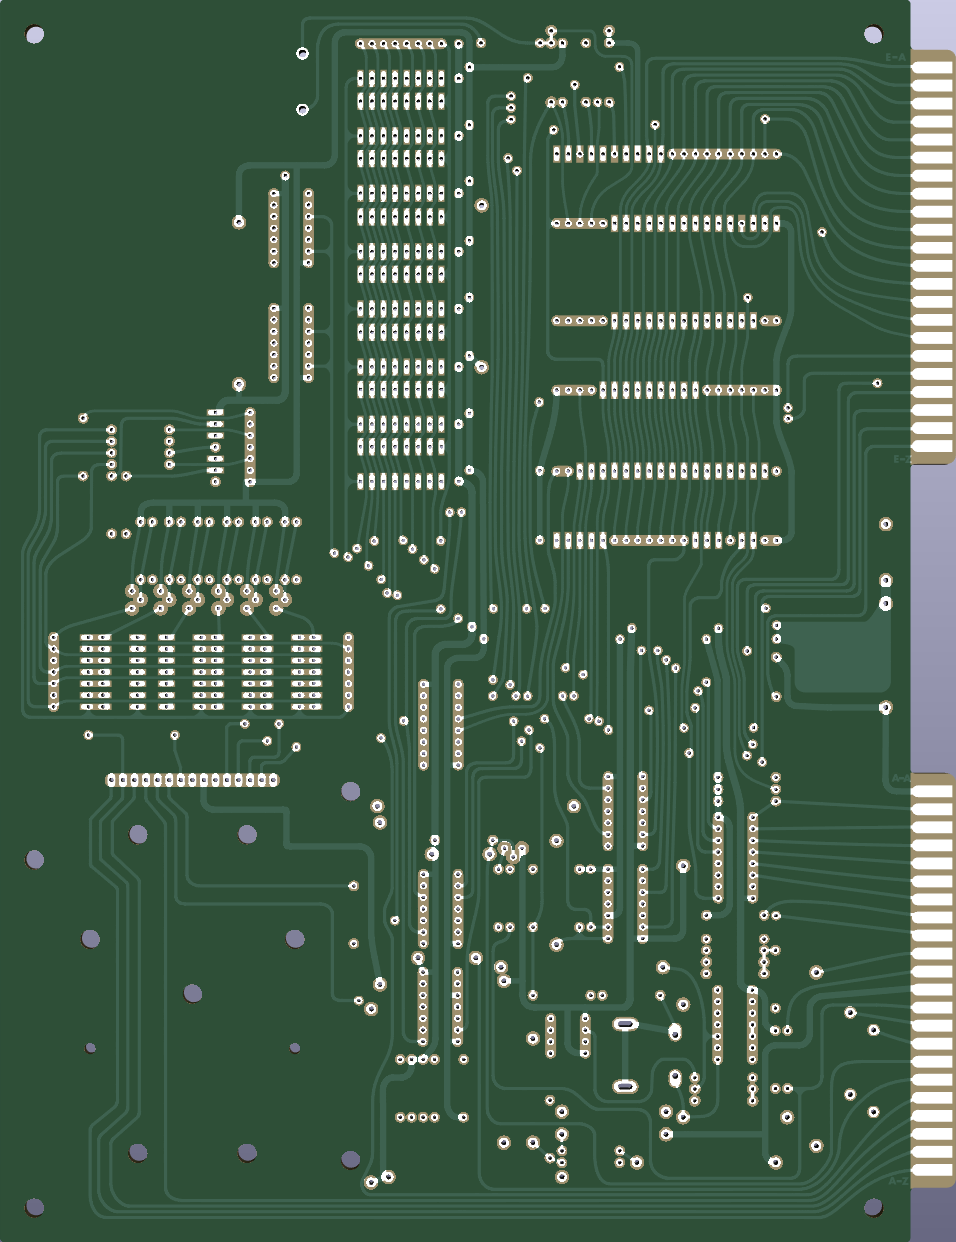
The PCB is an exact PCB replica of the KIM-1. It therefore requires 6530-002 and -003 RRIOTs, which are not available anymore (or use the Retrospy Technologies 6530 replacement boards).
See also:
MACH-9 MMS Inc 6809 CPU Plug-in for AIM 65
PicoSYM, a SYM-1 emulator on a Raspberry Pico
Amazing it works!
Transistors in the KIM-1
ZIPtape for KIM-1
The article about the Fast Cassette Interface is part of my CW Moser Assembler/editor package. Scanned by me in 2010 to the file kimfastcassette.pdf and on my website with the CW Moser package for years now .
Glen Deas knew it was designed by Lew Edwards and entered the source in modern assembler format.
See also:
KIM-1 connectors: beware the Chinese cheap variants!
Magazines: Compute! and Compute II
All documents in the MTU pages are now clean and higher quality, about 50 new PDFs.
Focal-65 V3D for TIM and KIM-1
My retro toolchain
Development for my old 8 bit retro SBC’s has become much easier with fast PCs and good tools. All cross development.
What took hours on my KIM-1: load editor form tape -edit source – save on tape (multiple tape files if big) – assemble form tape to tape – load binary from tape – run
can now be done very fast.
Powerful text editors, cross assembler, KIM-1 Simulator, seconds per iteration.
The only slow part remains: me!
More on my favorite toolchain here. 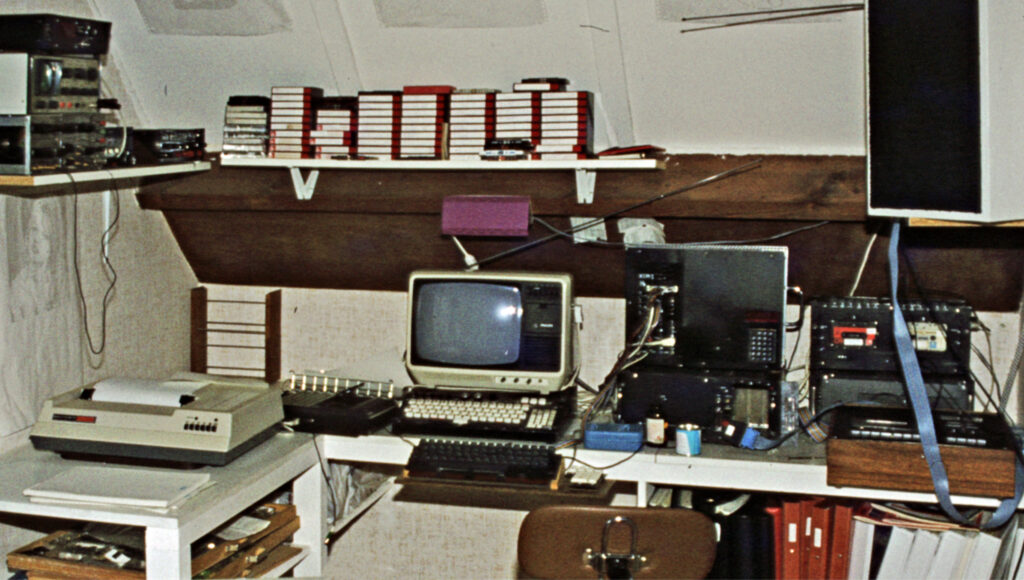
See also:
KIM-1 connectors: beware the Chinese cheap variants!
Magazines: Compute! and Compute II
All documents in the MTU pages are now clean and higher quality, about 50 new PDFs.
Focal-65 V3D for TIM and KIM-1
PC Tools
Updated December 2020, Linux compilation checked, bugs fixed, online program for comverting binary to wave file.
To aid in the handling of KIM-1 program and dataformats I have written some programs for Windows and Linux (Raspbian), sources included.
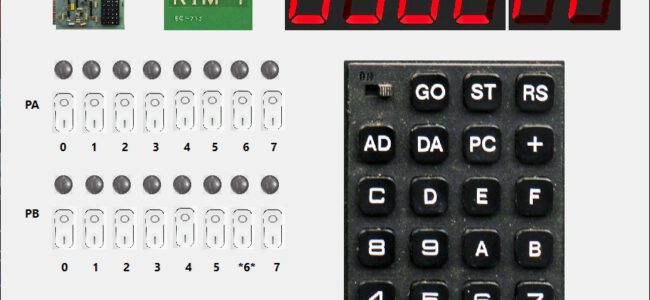
KIM-1 simulator
Convert 8 bit hex formats
KIMPaper
KIM Tape WAV to BIN conversion
KIMPoser Tape Convert hex to WAV online
KIM Tape Convert WAV to BIN and BIN to WAV
Pascal-M cross compiler
All programs come with source (Free Pascal Lazarus), compiled for Windows but thanks to Freepascal and Lazarus also compiled and tested on Linux (Ubuntu and Raspberry PI OS).
Convert 8 bit hex formats
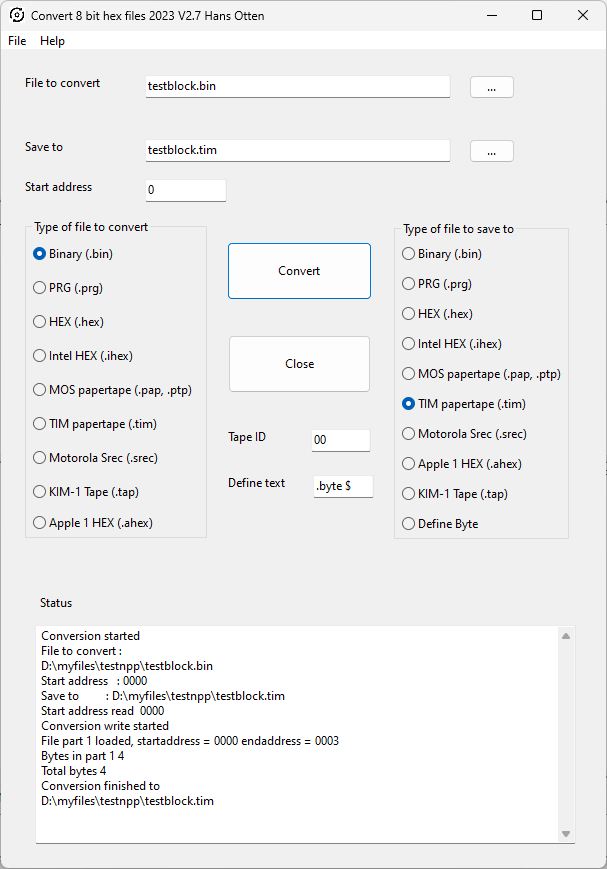
A general purpose utility to convert common 8 bit hex and binary formats, such as Intel HEX, Motorola S records, MOS Papertape, hex format, and binary files.
Sources (Freepascal Lazarus).
Convert8bithexformat Setup for Windows, Executables for Ubuntu and Raspberry PI OS
Available formats:
– BIN binary, raw data, no formatting, no information on start address.
– HEX formatted as hex numbers raw data, no start address included.
– IHEX Intel hex 8 bit format, multiple memory block, start address included.
– PAP MOS Technology papertape format, multiple memory blocks, start address included.
– SREC Motorola 8 bit S record, contiguous memory block, start address included.
– A1hex Apple Woz monitor hex format, start address included.
– KIM Tape as used in the KIM-1 Simulator as emulation of audio tape files.
KIM-1 simulator
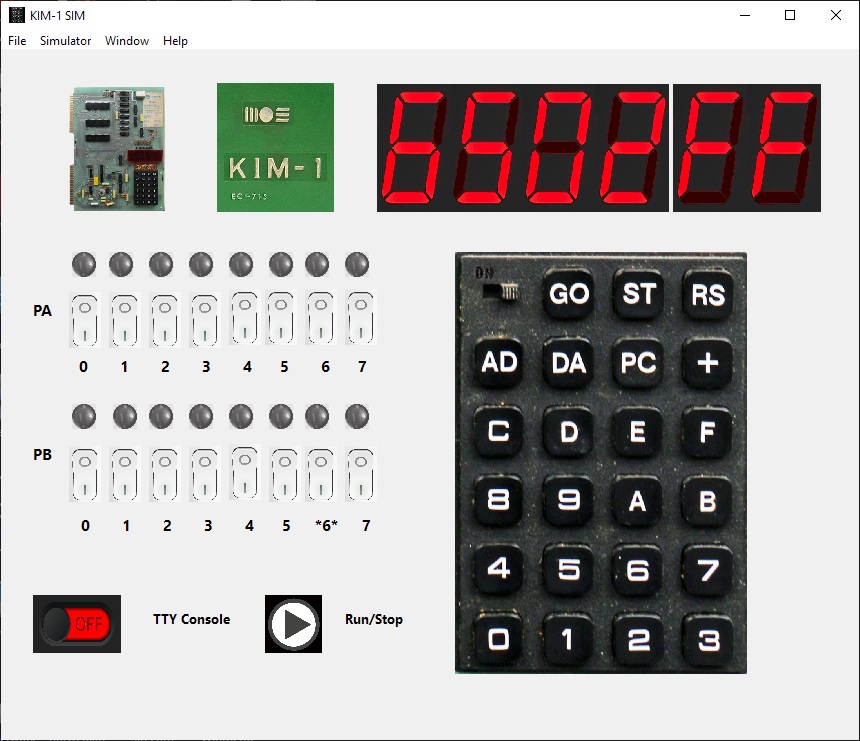
6502/65C02 CPU emulation, disassembler, TTY, KIM-1 keypad and LEDs.
See the KIM-1 Simulator page for more information.
KIM Paper
Note that the Conver8bitHexFormat program is also capable of converting to and from Papertape format from many more formats.
Originally written for the launch of the MicroKIM, an older version is on the support CD.
When you attach a serial device like the teletype or a modern PC with Hyperterminal you can use the TIM monitor of the KIM-1. One of the functions is loading from and saving to a papertape device on the teletype. Now since this is a way to load and save data as a textfile this is in fact quite useful.
The Micro-KIM triggered me to modernize my conversion utility for MOS Technology papertape format dating from 1983, VAX/VMS and Turbo Pascal. A Windows and a commandline/console version are available.
KIMPAPER for Windows
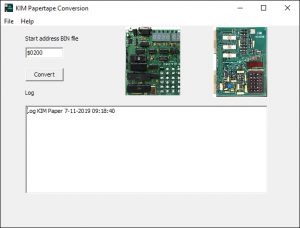
A program for Windows to convert between papertape and binary format.
Windows setup KIMPAPER
Sources (Freepascal Lazarus, build also on Linux)
KIMPAPER V1.1 for DOS
Not too modern, but handy, a commandline utility. Does exactly the same as the Windows program KIMPAPER. Runs fine in a commandline DOS box. Can also be compiled for Linux with Freepascal. In the KIMPAPER DOS archive the program, source and information on the program and papertape format can be found.
C:\MICROKIM\kimpaper
KIM-1 MOS Technology BIN papertape format conversion utility, Hans Otten, 2007 v1.1

Syntax is:
KIMPAPER [-[b|p] filename [startaddress]
C:\MICROKIM\kimpaper -h
KIM-1 Mos Technology BIN papertape format conversion utility, Hans Otten, 2007 v1.1
Syntax is: KIMPAPER [-[b|p|h] filename [startaddress] first parameter switches
-h help
-p convert to papertape
-b convert to binary
second parameter (first if no parameters, assumed binary to papertape)
name of file to convert
.BIN for binary, forces conversion to PAPertape
.PAP for papertape, forces conversion to BINary
third parameter (assumed 0000 if not present)
startaddress for BIN to papertape conversion
Files of type .BIN wil force conversion to papertape.PAP
Files of type .PAP wil force conversion to binary .BIN

Examples:
C:\MICROKIM\kimpaper mastermind.bin 0200
KIM-1 Mos Technology BIN papertape format conversion utility, Hans Otten, 2007 v1.1
C:\MICROKIM>kimpaper mastermind.pap
KIM-1 Mos Technology BIN papertape format conversion utility, Hans Otten, 2007 v1.1
Start address 0200 in file mastermind.BIN
Convert KIM tape to text
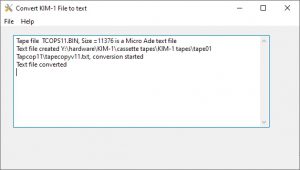
KIM Tape to Text is a utility to convert between binary format of a KIM-1 tape dump to a DOS text file.
The KIM tape dump is a binary file and is just a dump of part of the memory of the KIM-1.
This binary file can be a text file as used in editors Micro Ade or CW Assm/TED.
By using the tape write routine in the KIM-1 one can write an audio file on cassette.
When this audio file is captured on a PC as WAV file (22K, mono) this can be converted back to a binary memory dump with ED’s Utility KIMTape
These text files can be converted to DOS text files with this utility.
First open the binary file. If this is recognized as Micro Ade or CW Moser format, the Save as text file can be used.
Windows program.
Full source for Freepascal and Lazarus, no Windows dependencies. Compiled on 64 bits Windows 10 as 32 bit application.
Note on detection of assembler editor type
1. Micro Ade file must start with CR: when present this is Micro Ade
line nr follows 2 byte
line ends with $0D
file ends with $40
2. Assm/Ted by CW Moser starts with line number $10 $00
end of line is high bit set
There may be rare situations that a file starts with a $0D or a different line nr. You can force CW Mose detection by changing this to a sequence of $10 $00 $0D and if necessary blanks $20 to make it consistent. If in doubts: use an editor that shows the file in hex (Ultra Edit, or the free Notepad ++, Text editor PRO) and study the tape file.
Methods to get the binary file out of a Junior or KIM-1.
Read the record tape into a binary with Ed’s KIMTAPE conversion *see below). It is MS-DOS and runs fine in VDOS (https://www.vdos.info/) or DOsbox (slow).
Make a note of start address as shown by KIMTAPE.
Non-printing ASCII characters are filtered out of the resulting text file.
KIM Tape Convert WAV to BIN and BIN to WAV
Not my program, but so handy!
KIMTAPE v0.5 – tape conversion utility for KIM-1 and SYM-1 (2004-05-17) Local copy of http://dxforth.mirrors.minimaltype.com/#kimtape)
KIMTAPE allows programs stored on cassette tape to be decoded to a program file. It handles both MOS Technology KIM-1 and Synertek SYM-1 tape formats including HYPERTAPE. The reverse process – converting a program file to an audio wavefile is also possible, allowing one to produce perfectly regenerated cassettes. KIMTAPE works with 8-bit mono WAV, VOC or RAW audio files recorded
at 22050 samples per second.
Download: kimtap05.zip (MS-DOS) It is MS-DOS and runs fine in VDOS (https://www.vdos.info/) or DOSbox (slow).
The binary files in the KIM-1 program archives have been reproduced, from the original cassette recordings, with the tool KIMTAPE on a PC in a DOS box. See Eds DX-Forth and Utilities Page for this and other nice programs.
This program also makes it possible to reproduce the original cassette recordings that can be read by a KIM-1.
The files were made as follows: The KIM-1 cassette audio was connected to the PC audio input and (with e.g. Audacity) recorded as a wave file (mono 22KHz).
For example: qchess.wav
The wave file was then converted with KIMTAPE to a binary file (the exact content of of the KIM-1 memory when recorded).
And the KIMTAPE utility then displays load address (for example and tape ID
c:\kimtape qchess.wav qchess.bin
KIMTAPE version 0.5 17-May-04
infile: qchess.wav
outfile: qchess.BIN
Program 01 address 0200 checksum OK xxxx bytes done
This .bin file (any extension is fine!) is NOT a wave file! It contains the exact content of the KIM-1 memory when recorded. The size is exactly the number of bytes as stored in the memory of the KIM-1 and much smaller than the wave file. This binary file can be converted back to a wave file with KIMTAPE or converted to a papertape file with KIMPAPER:
C:\kimtape -M -A0200 -D01 -B2 qchess.bin qchess.wav
As you can see: you have to specify the load address and the program ID. The B parameter indicates hypertape speed (2 here, slow)
The resulting wav file should be acceptable for the KIM-1. It is (as I have tested) acceptable as input for KIMTAPE!
All command parameters can be seen by typing KIMTAPE without parameters:
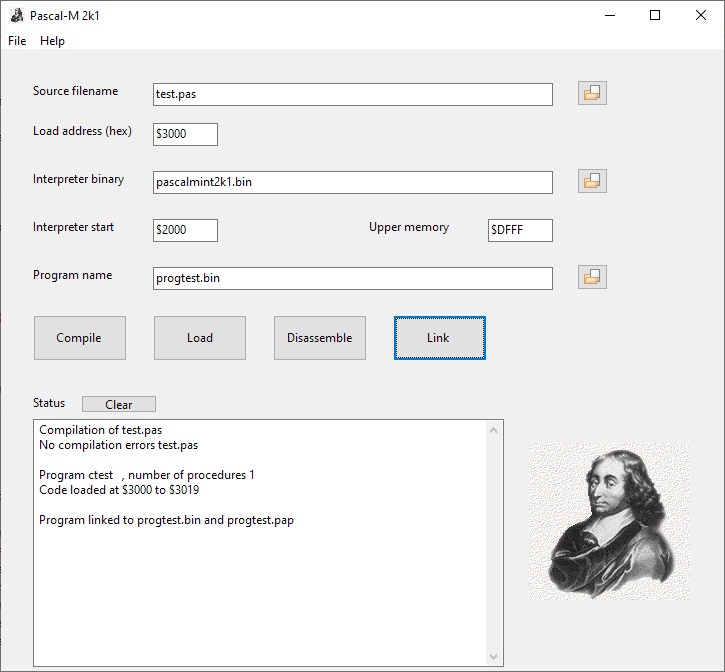
Pascal-M Cross compiler
Executables of cross compiler, workflow, sources, command line utilities.
See also:
MACH-9 MMS Inc 6809 CPU Plug-in for AIM 65
PicoSYM, a SYM-1 emulator on a Raspberry Pico
Amazing it works!
Transistors in the KIM-1
PRDIS, Printing Disassembler
In 1982 I wrote/composed a program to have disassembled code on paper, with page numbers. Read more about it here.
The core routine of the disassembler is the well-known Steve Wozniak/Allen Baum 1976 article A 6502 Disassembler from Apple
The program is a TTY program. I build it with the then current hardware and software of my KIM-1:
- 32K RAM from $2000
- Video terminal uppercase 24×32 on the KIM TTY serial in/output
- A parallel ASCII keyboard connected to the second 6532 RIOT port
- A serial connected, at 9600 baud, Heathkit H14 matrix printer
- Dual audio cassette records under motor control
- MICRO ADE assembler/Editor, extended and with video TTY as output, parallel keyboard as input and could print at the H14 printer

See also:
KIM-1 connectors: beware the Chinese cheap variants!
Magazines: Compute! and Compute II
All documents in the MTU pages are now clean and higher quality, about 50 new PDFs.
Focal-65 V3D for TIM and KIM-1
Printing Disassembler
In 1982 I wrote/composed a program to have disassembled code on paper, with page numbers.
The core routine of the disassembler is the well-known Steve Wozniak/Allen Baum 1976 article A 6502 Disassembler from Apple
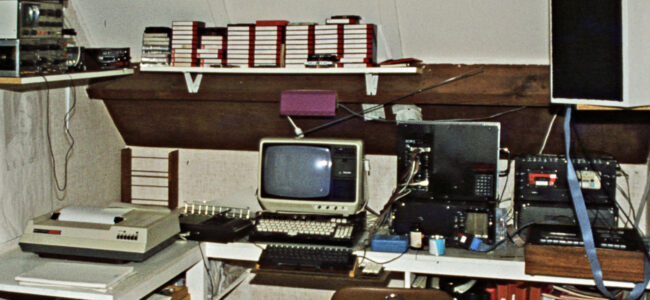
The program is a TTY program. I build it with the then current hardware and software of my KIM-1:
- 32K RAM from $2000
- Video terminal uppercase 24×32 on the KIM TTY serial in/output
- A parallel ASCII keyboard connected to the second 6532 RIOT port
- A serial connected, at 9600 baud, Heathkit H14 matrix printer
- Dual audio cassette records under motor control
- MICRO ADE assembler/Editor, extended and with video TTY as output, parallel keyboard as input and could print at the H14 printer
Only the KIM-1 survived today this setup and is now on display above my desk in an acryl case. Most of the software is converted from tape and is on this site in the KIM Software page.
The program was written to have a disassembled printed listing of software like the Microsoft Basic KB9 and other binary only software, so I could analyze, make notes and patch it at will to my hardware and more. It was located at location $B000, out of the way of where most programs were loaded, like $0400 or $2000.
The program prompts for output to video or to video + printer. If printer is selected the output will be paginated with page numbers and it asks for a header text.
I still have the printed output of Microsoft Basic with my hand written notes on it.

My workplace setup in 1982: KIM-1, dual cassette, tv monitor, H14 printer, ASCII keyboard
The original source and binary (restored from cassette, the previous version on the website was incomplete):
Printing disassembler, load and start address is $B000
Source of disassembler
Requires a parallel keyboard for character input at the free 6530 PIA port. H14 printer output if print is requested.
As is not fit for a standard KIM-1!
PRDIS Version 2
In January 2023 Glen Deas, K5GED, approached me about this program. He found out the binary was missing the last bytes (now corrected). He also showed me how he converted the MICRO ADE source to AS65 format and made it use the KIM-1 standard TTY I/O again.
Printing disassembler, load and start address is $B000 for KIM-1, Glen Deas version
   ; VERSION 1.1 JANUARY 2023  SYNTAX MODIFIED FOR THE
   ;  A65 CROSS ASSEMBLER   GLEN DEAS, K5GED  USA
       INVOKE A65:  A65 -L -M -H D6502TTYV2.S
   ; Version 2.0  MODIFIED TO USE THE KIM-1 SERIAL I/O INSTEAD OF PARALLEL KEYBOARD
   ;               USING KIM'S TTY ROUTINES - BY DEFAULT IT OUTPUTS TO THE VIDEO
   ;               MONITOR/TTY VIA THE OUTCHK CALL TO THE KIM-1 MONITOR
   ; Set up Procomm up for 7 data, Mark parity, and 2 stop bits, no echo
PRDIS Version 3
I could not resist to spent an afternoon on the source Glen Deas has given me. So much fun to work on code 40 years later. Grateful to Glen for his work on his vesion.
Here is my latest version, running fine in the KIM-1 Simulator.
Source and binary in papertape format V3 of PRDIS
Improvements in V3:
- No problems with echo or 7 bit anymore, all standard KIM-1 monitor
- Lowercase messages
- Code for H14 printer or parallel keyboard commented out, reducing size
- Rommable, variables moved to RAM $0200, program at $B000
- Stops output after every 16 lines, any key but Enter stops program
- Source formatted and syntax for TASM32, license added
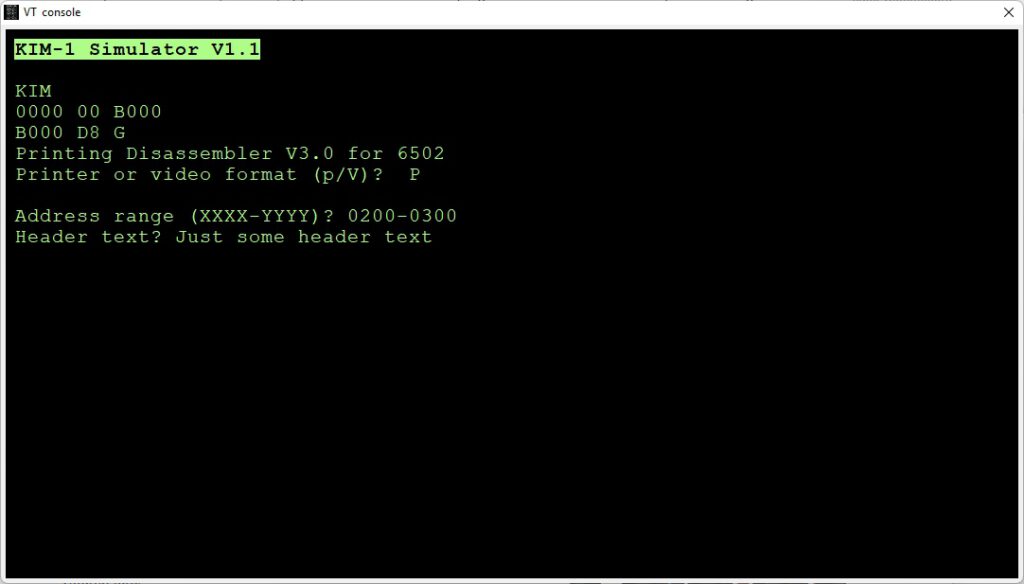
Example session, PRDIS disassembling itself without and with Pagination:
KIM
B000 D8 G
Printing Disassembler V3.0 for 6502
Printer or video format (p/V)?

Address range (XXXX-YYYY)? B000-B100
Disassembly:
B000  D8          CLD
B001  A2 FF       LDX #$FF
B003  9A          TXS
B004  A9 01       LDA #$01
B006  8D 00 02    STA $0200
B009  A9 00       LDA #$00
B00B  85 EE       STA $EE
  .
  .
  .
B0F6  C9 22       CMP #$22
B0F8  F0 13       BEQ $B10D
B0FA  29 07       AND #$07
B0FC  09 80       ORA #$80
B0FE  4A          LSR
B0FF  AA          TAX

KIM
B000 D8 G
Printing Disassembler V3.0 for 6502
Printer or video format (p/V)?  P

Address range (XXXX-YYYY)? B000-B200
Header text? PRINTING DISASSEMBLER

PRINTING DISASSEMBLER                                             Page 01

B000  D8          CLD
B001  A2 FF       LDX #$FF
B003  9A          TXS
B004  A9 01       LDA #$01
B006  8D 00 02    STA $0200
B009  A9 00       LDA #$00
B00B  85 EE       STA $EE
B00D  8D 01 02    STA $0201
B010  20 2A B3    JSR $B32A
B013  A2 B4       LDX #$B4
B015  A0 AC       LDY #$AC
  .
  .
  .
B1C6  60          RTS
B1C7  A5 F0       LDA $F0
B1C9  38          SEC

PRINTING DISASMBLER                                             Page 05

B1CA  A4 FB       LDY $FB
B1CC  AA          TAX
B1CD  10 01       BPL $B1D0
B1CF  88          DEY
  .
  .
  .
B1F9  33          ???
B1FA  D0 8C       BNE $B188
B1FC  44          ???
B1FD  00          BRK
B1FE  11 22       ORA ($22),Y

KIM
B000 D8
See also:
MACH-9 MMS Inc 6809 CPU Plug-in for AIM 65
PicoSYM, a SYM-1 emulator on a Raspberry Pico
Amazing it works!
Transistors in the KIM-1
Corsham Bus Extender
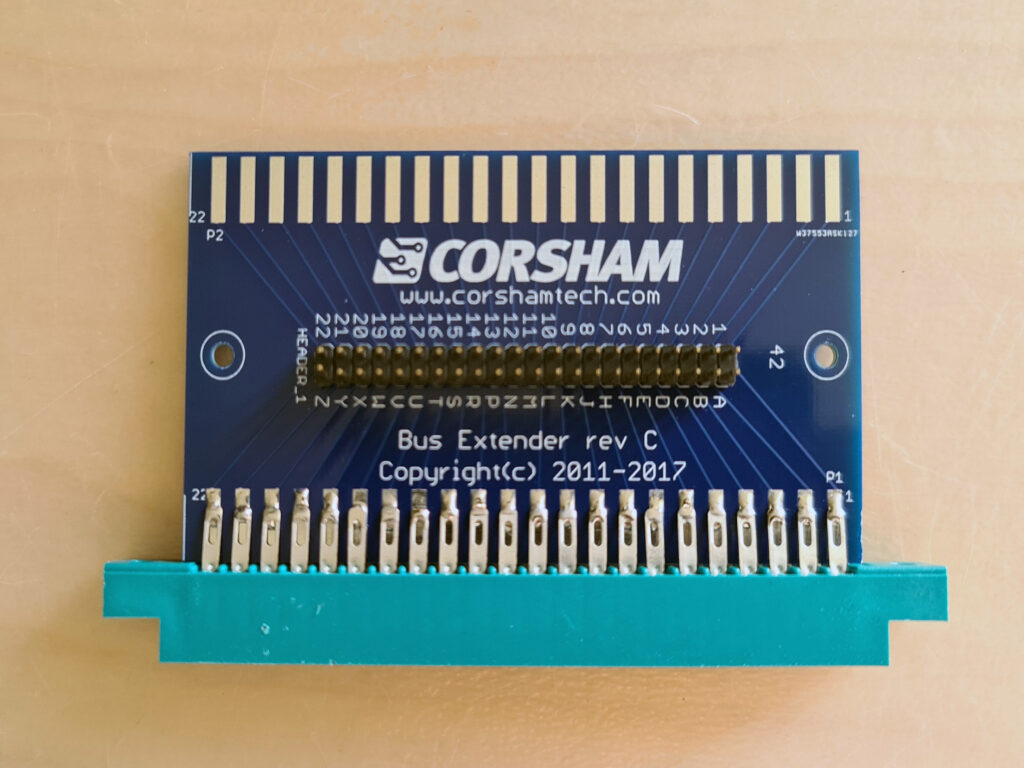
Corsham Technologies produces a Bus Extender fot the KIM-1. Simple but so handy
It is placed beween the external device on Application or Extension Connector and has 44 pin header to attach wires to a breadboard for example.
Only negative I can say about it, tinned edge connectors and not gold plated.
Nice addition to my Reproduction KIM-1s!
See also:
KIM-1 connectors: beware the Chinese cheap variants!
Magazines: Compute! and Compute II
All documents in the MTU pages are now clean and higher quality, about 50 new PDFs.
Focal-65 V3D for TIM and KIM-1
KIM-1 Rockwell sticker
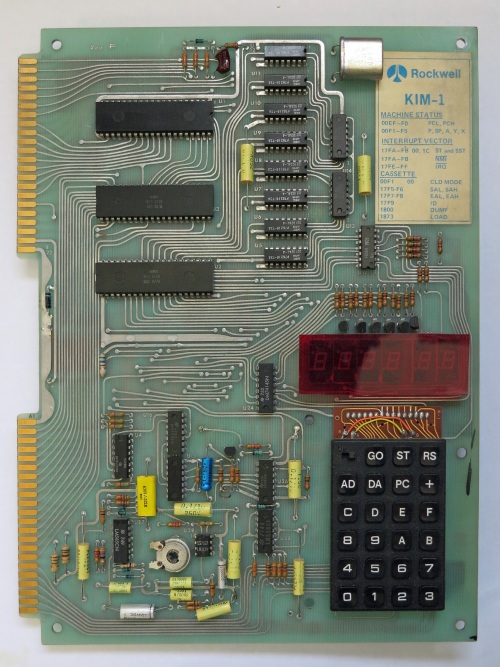
My KIM-1 came as an Rockwell OEM kit. The Rev F board is made by Commodore MOS Technology, the packaging and manuals are the original MOS Technology books, but Rockwell branded.
The logo on the KIM-1 is covered with a sticker, of course to have the Rockwell logo on the board. But some one was so clever to add essential information and addresses of the KIM-1 monitor.
See also:
KIM-1 connectors: beware the Chinese cheap variants!
Magazines: Compute! and Compute II
All documents in the MTU pages are now clean and higher quality, about 50 new PDFs.
Focal-65 V3D for TIM and KIM-1
KIM-1 Rev A Photos
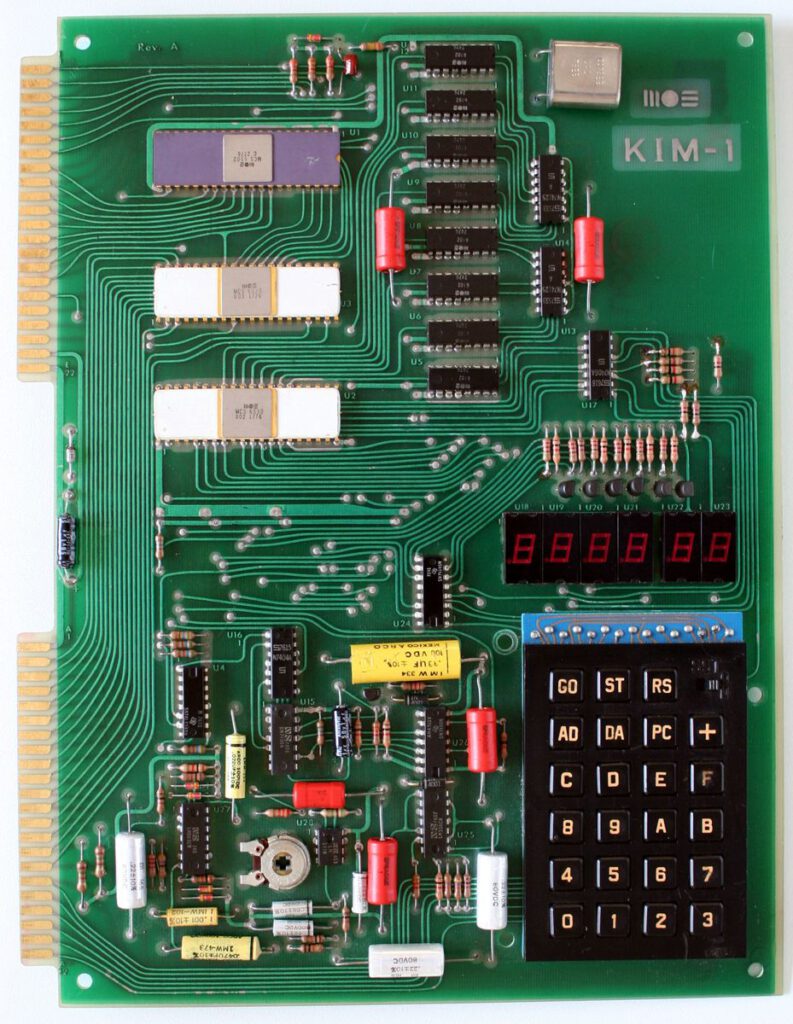
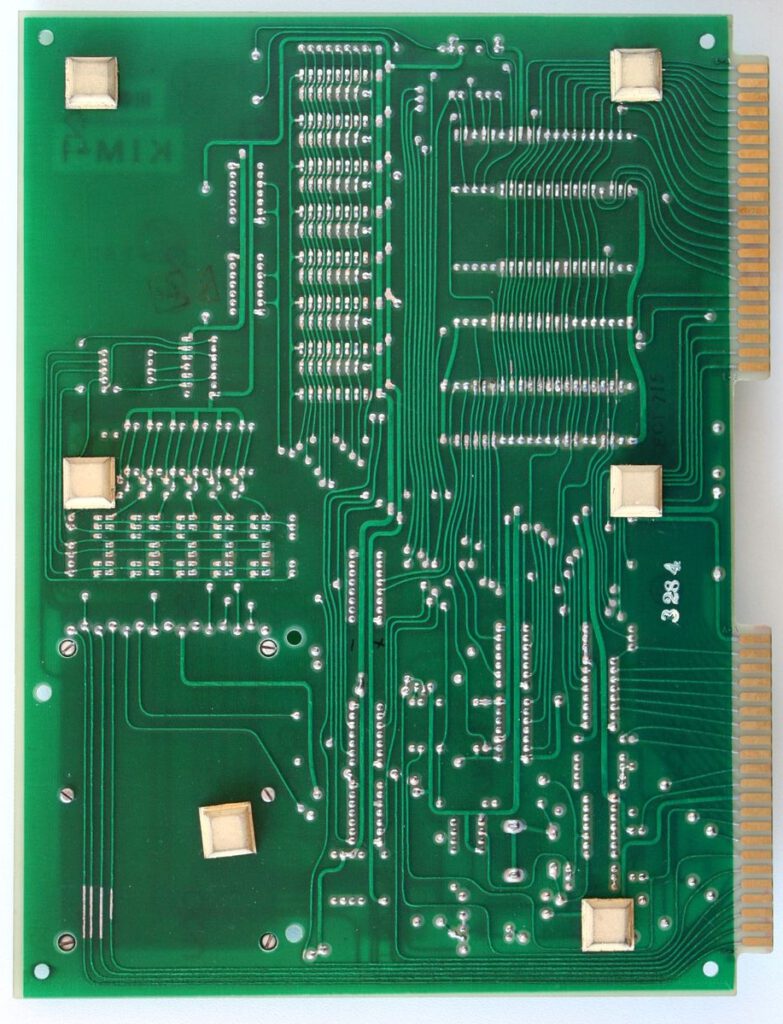
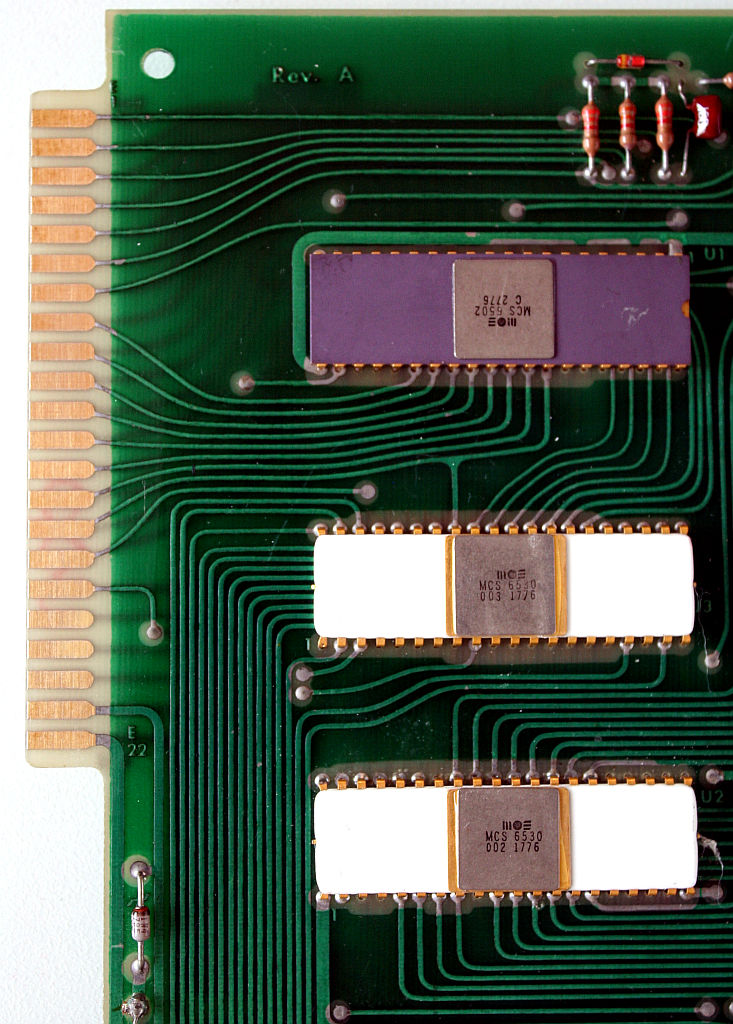
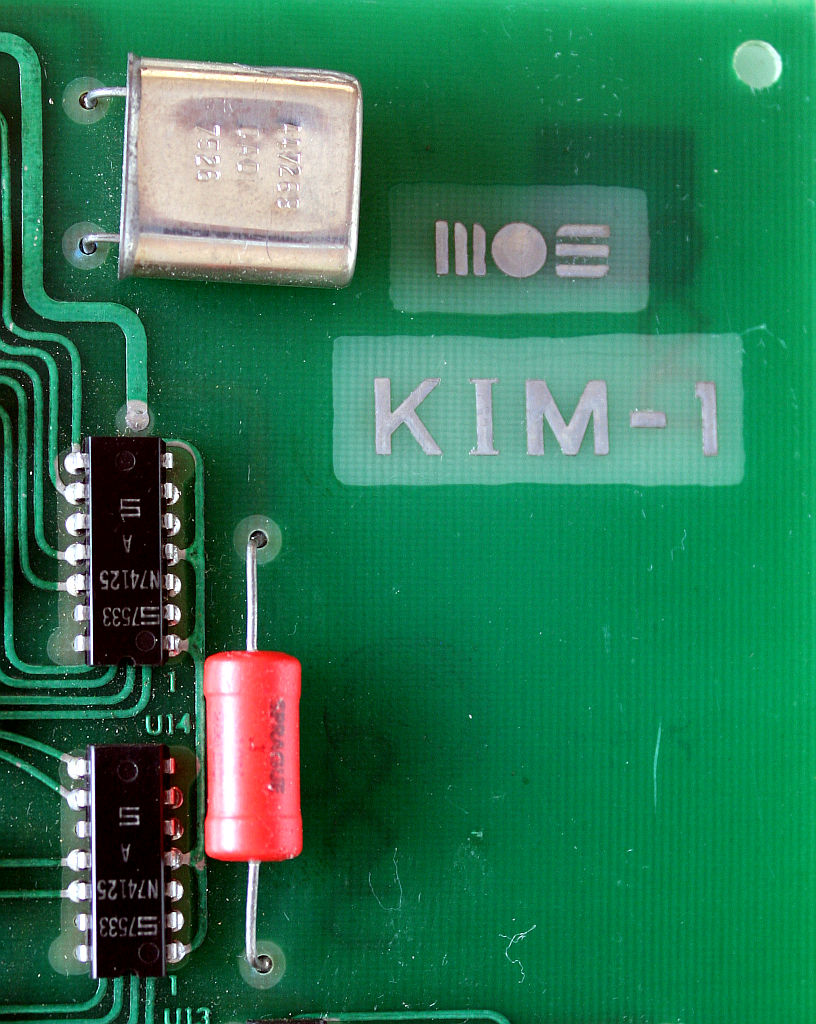
Guido Lehwalder gave me photos of his KIM-1 Rev A. Thanks!
Note the different colors of components.
I added these to the KIM-1 Revisions page.

