
Ben Eater surprised us with his video hands-on series about a breadboard computer.
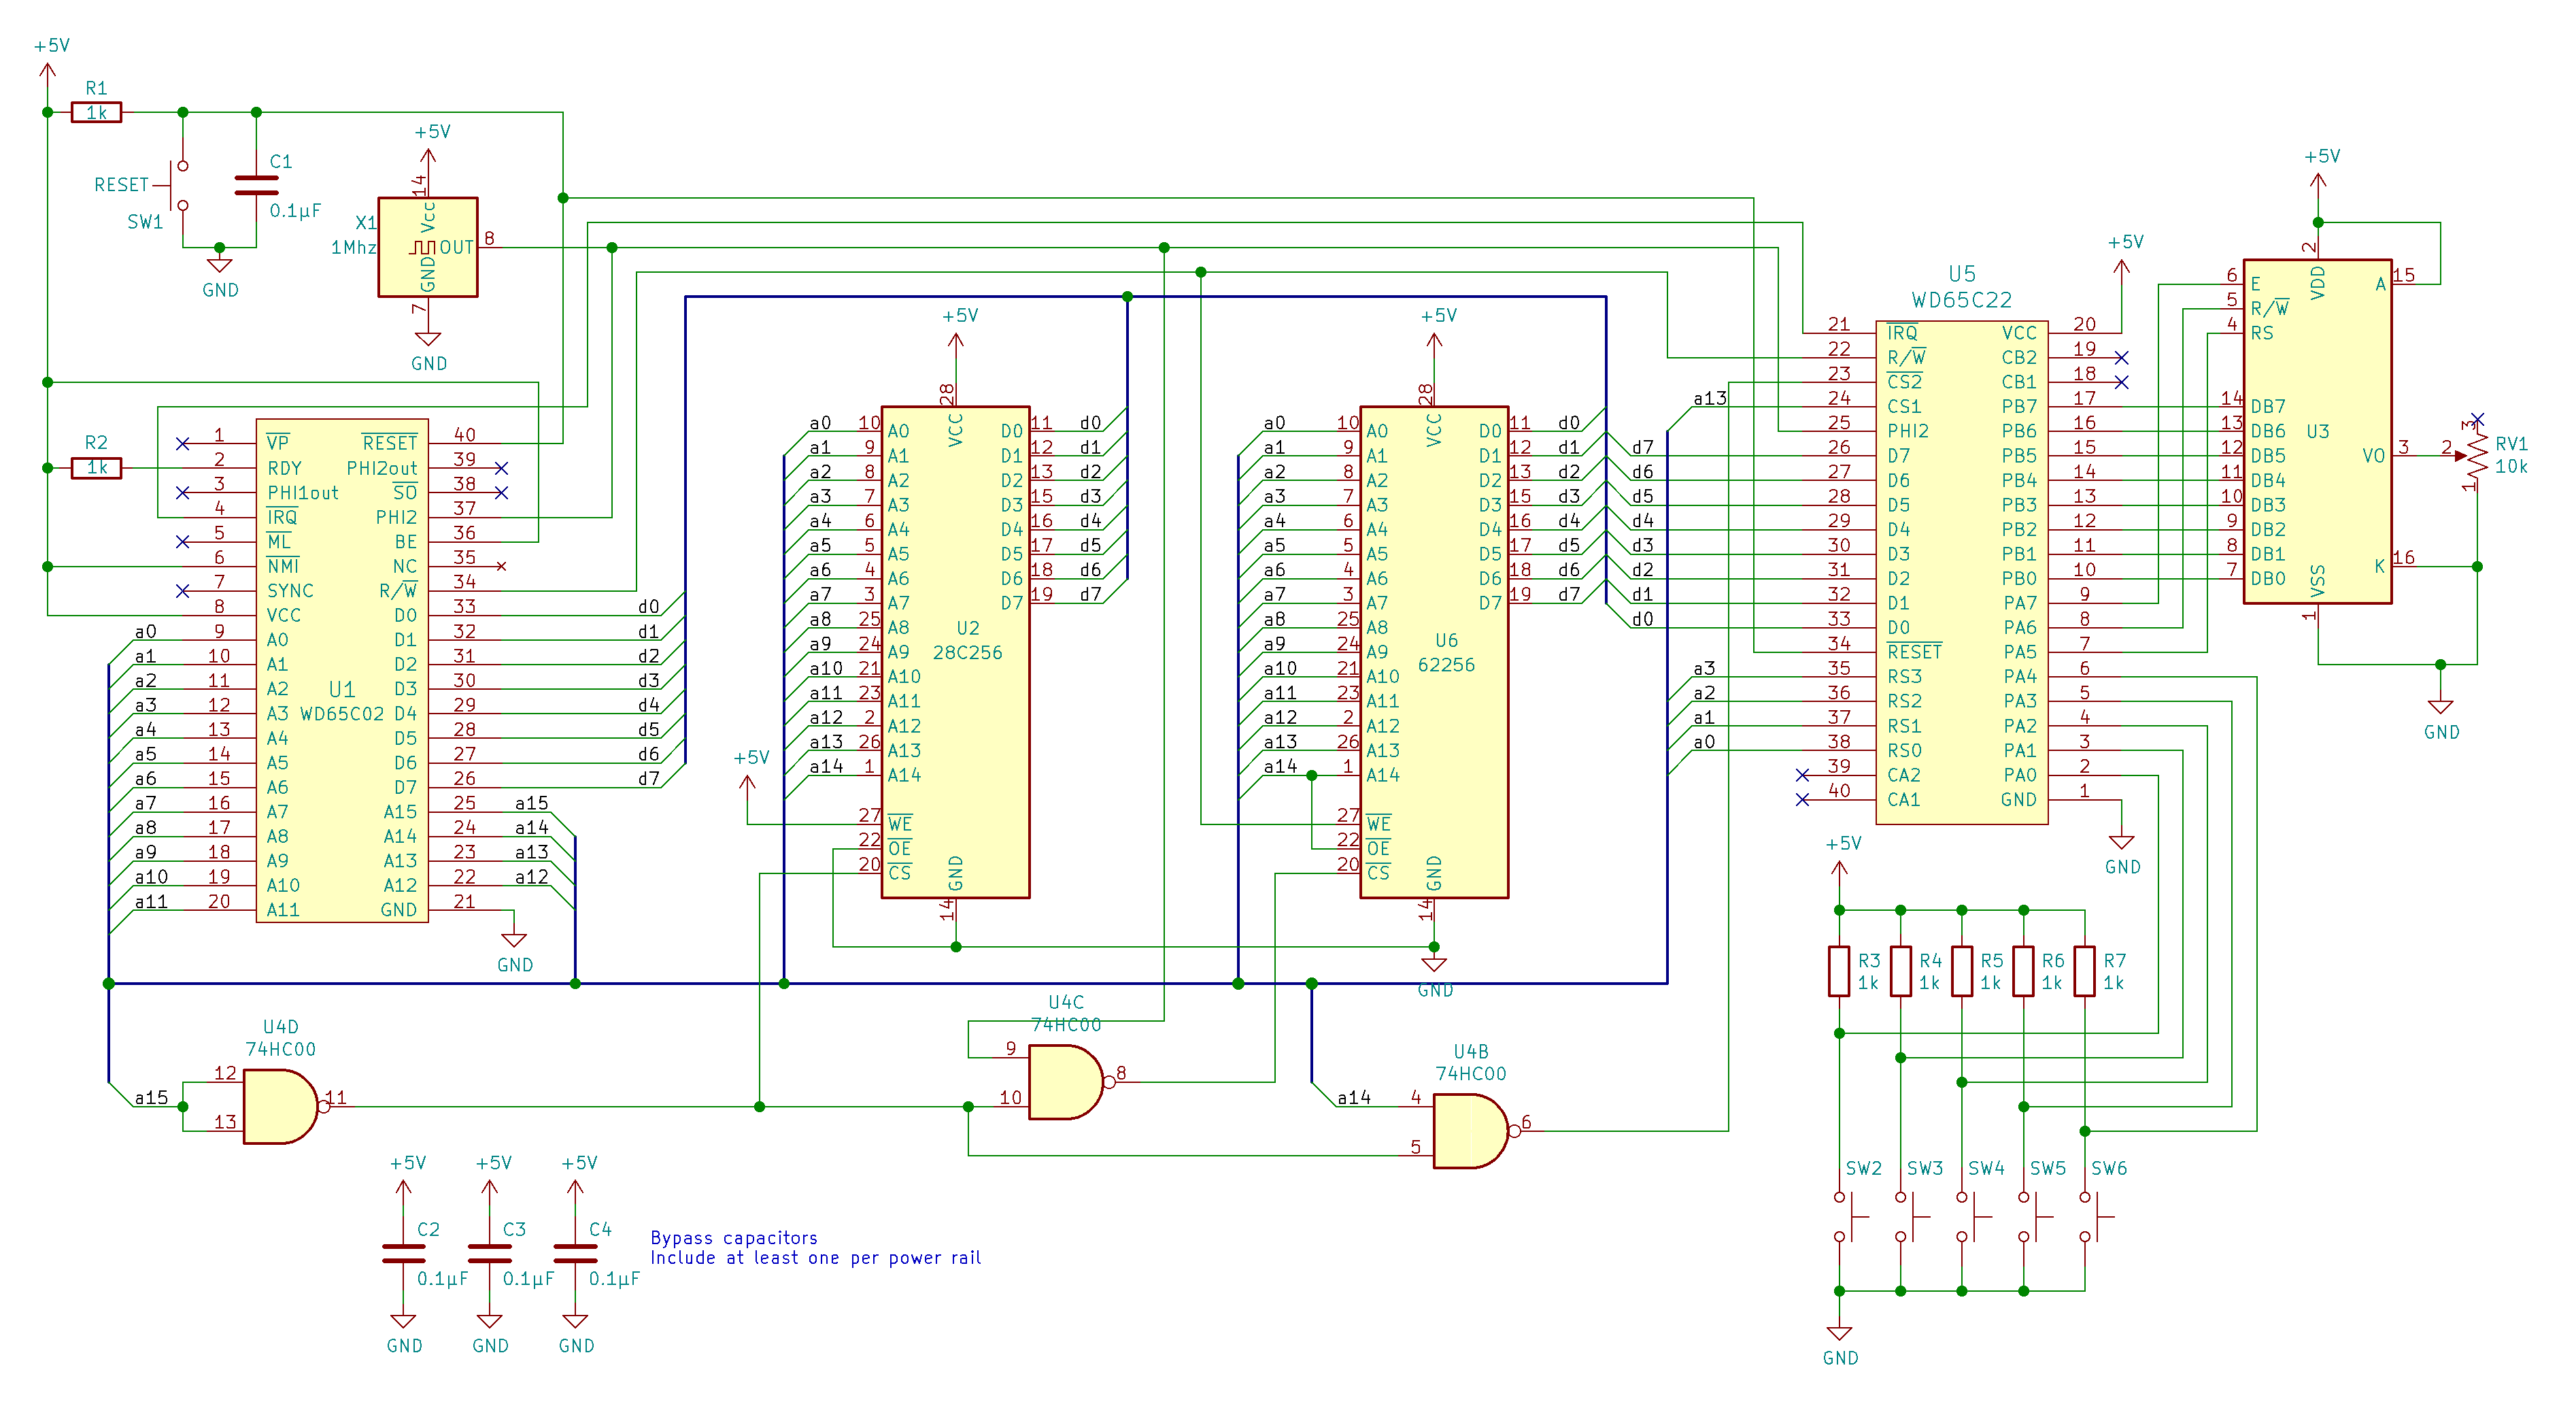
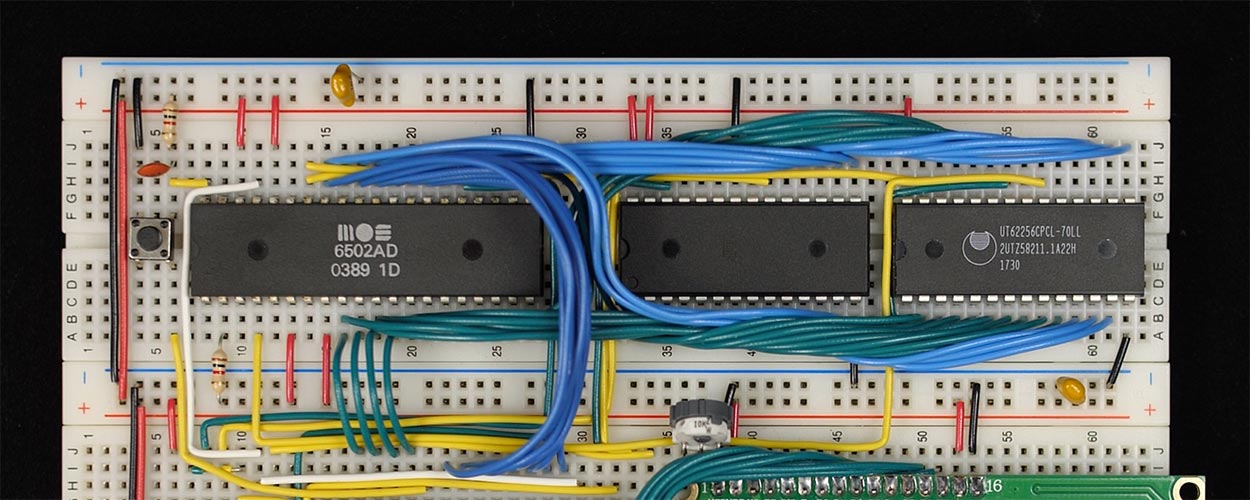
In many episodes, Ben showed how to build a very simple 6502 computer. Well explained, well executed. The result is a working computer!
You can either source the parts yourself or buy a complete kit from Ben Eater, see his website.
Make sure you buy quality breadboards.
The design is simple, and looks a lot like the early simple SBC’s on this site, and perhaps Grant’s 8-chip (or 7-chip) 6502 computer on breadboard was part of the inspiration.
Ben does a fabulous series of YouTube videos about wiring together this 6502 breadboard computer.
It really is extremely interesting and educational. I strongly recommend you watch the video series and consider supporting Ben’s Patreon.
You can buy a kit from Ben. Ben has put a lot of work into making these educational videos — I suggest you support him and his future endeavours by buying his kits from him.
To play and have some fun: visit this web browser based emulator.
Now seeing him building this computer is a lot of fun, and many have done it. Do not pay attention to the grumpy old man at a certain 6502 related forum, the design and the build videos are fine and fit for beginners. It is a 1 MHz design, so no need for ultrafast logic IC’s.
Software
Ben limits software to simple examples, like how to show characters on the LCD or receive a charater via a bitbanged serial interface.
Below I present several ways to have the computer build on a PCB and let it do something useful, first an EHBasic one , the second a Tiny Pascal/assembler. Both require hardware additions.
Enhance Move the Ben Eater design to PCB
A breadboard computer is a nice start. Making it more permanent is a better solution once the experiments and modifications and additions are done and requires a PCB. And of the many appeared.
BenEaterPCB
First a simple and basic one. On the bolwire github page you find a nice designed PCB for the basic Ben Eater design. Nice features are the extra pins at 6502 and 65C22, which make testing easy. I have a PCB and plan to build the basic Ben Eater computer on it.
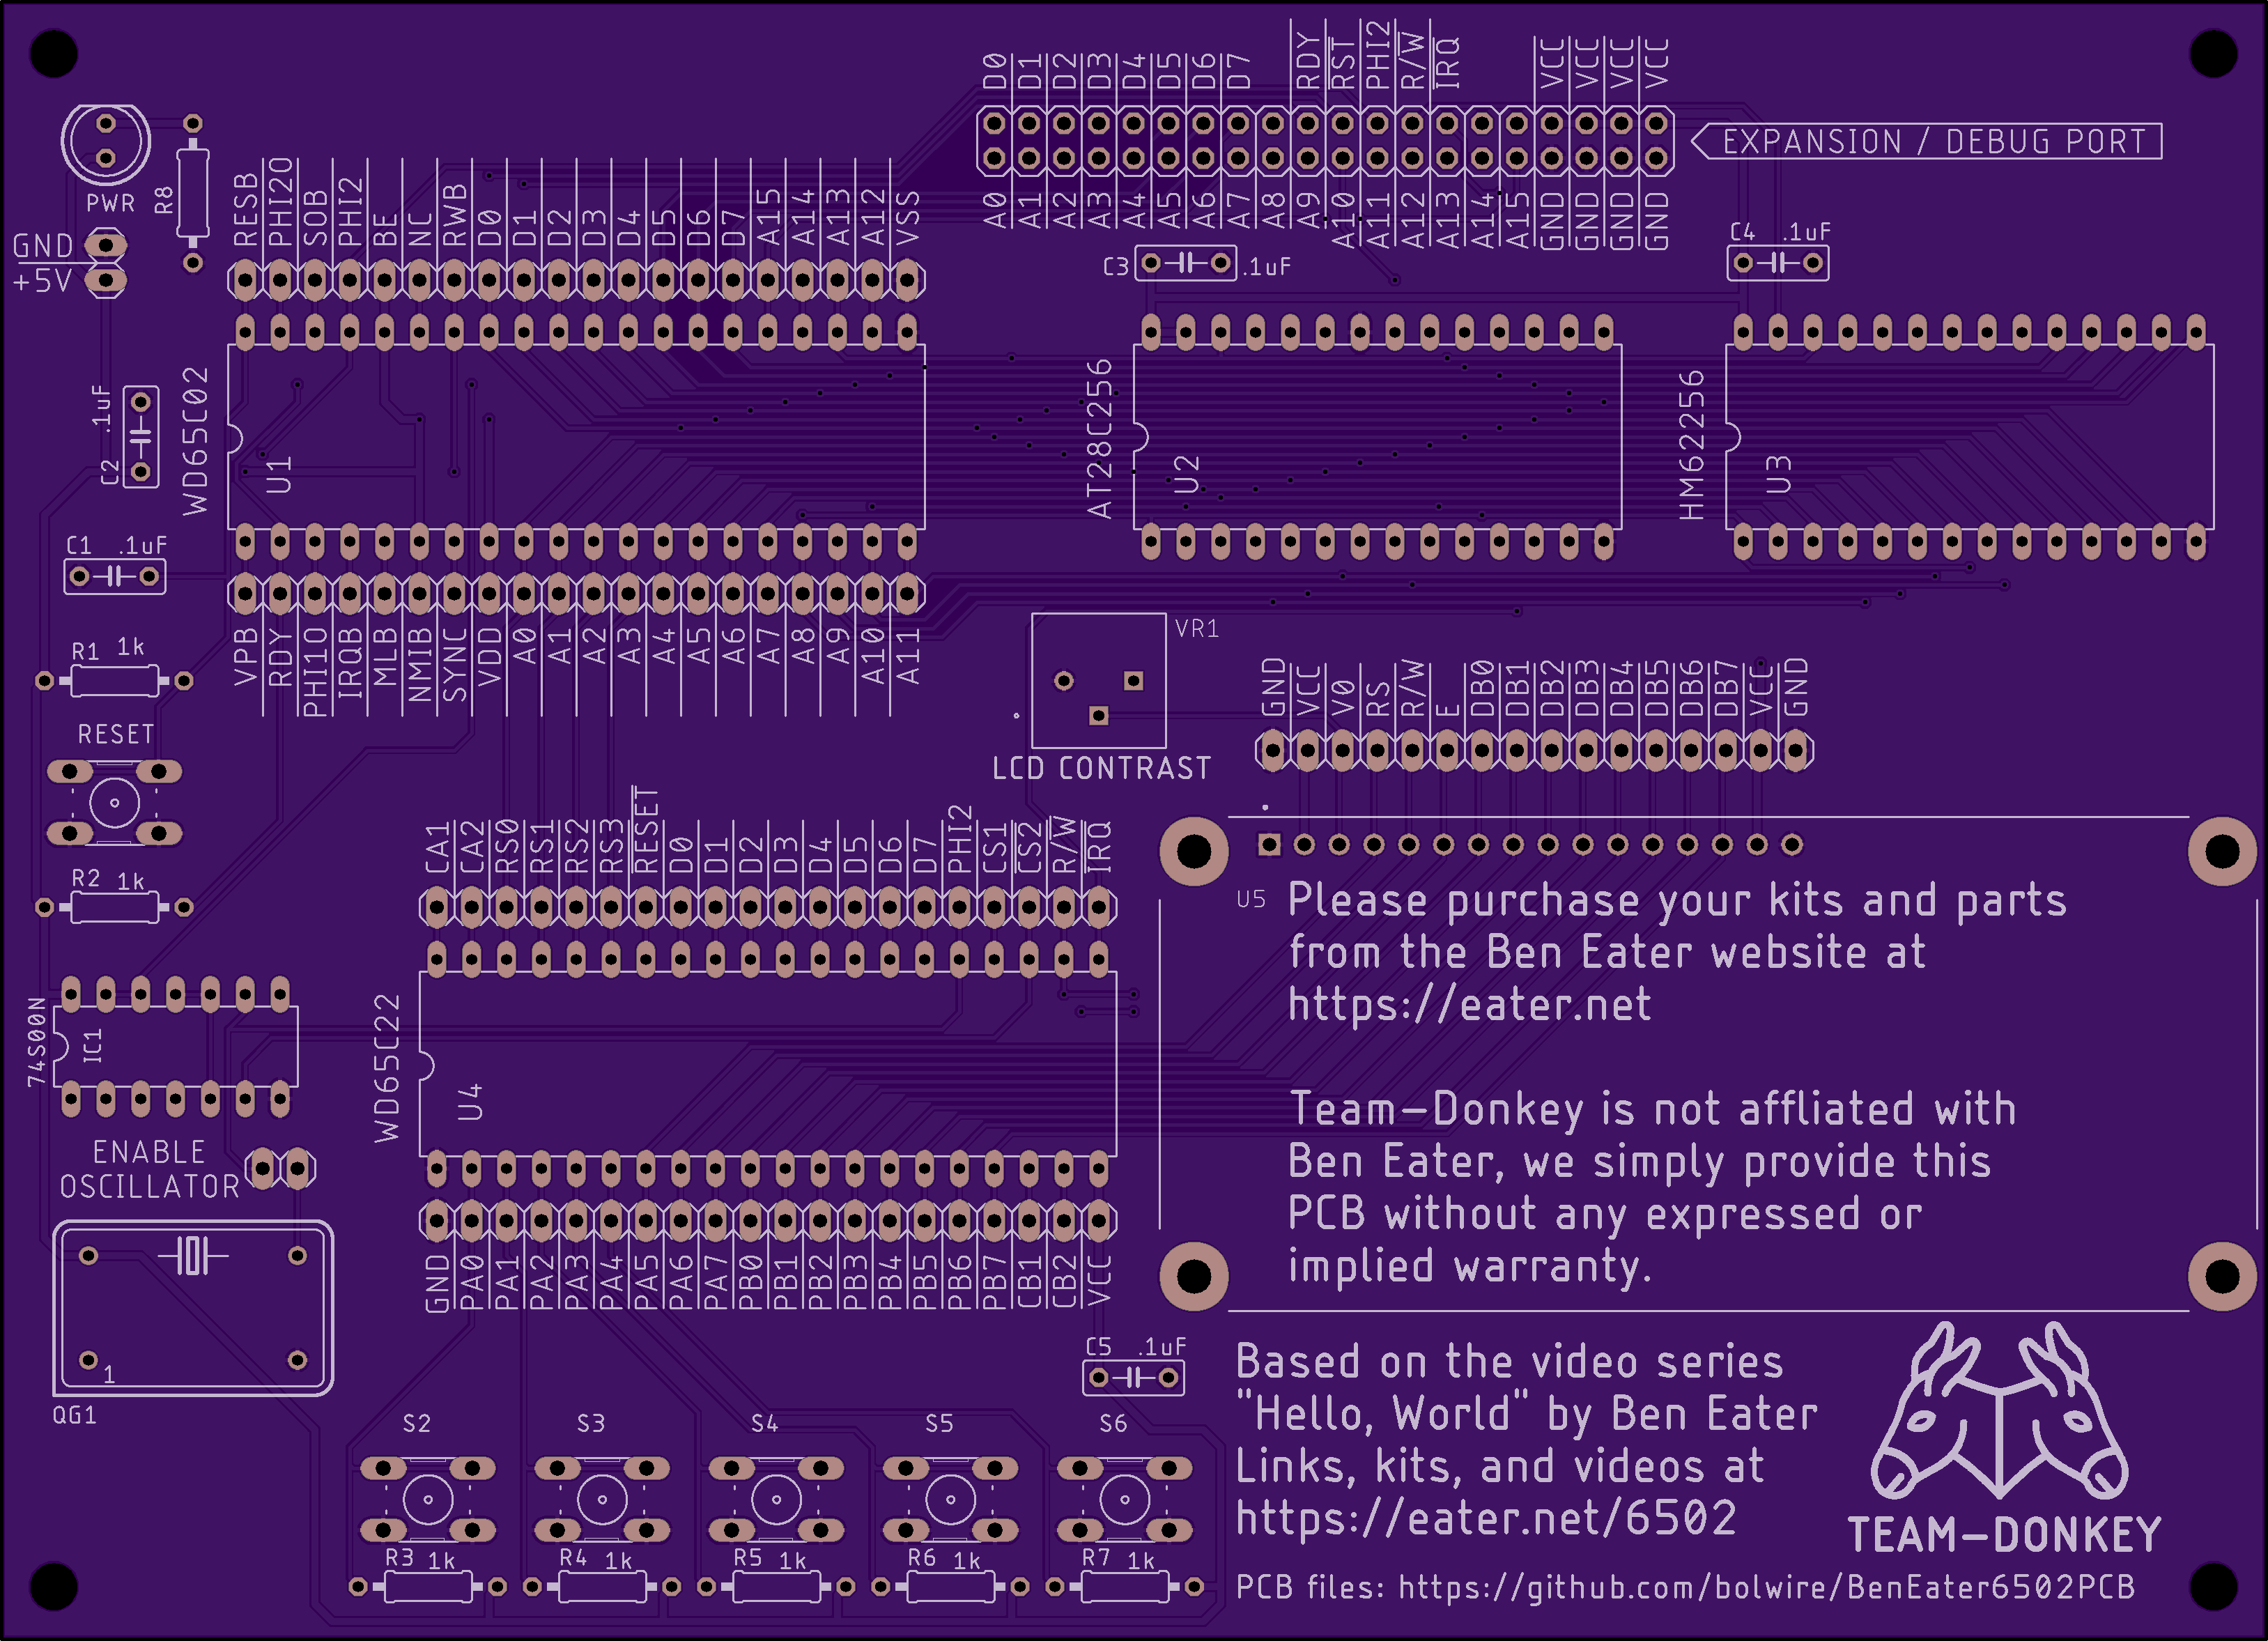

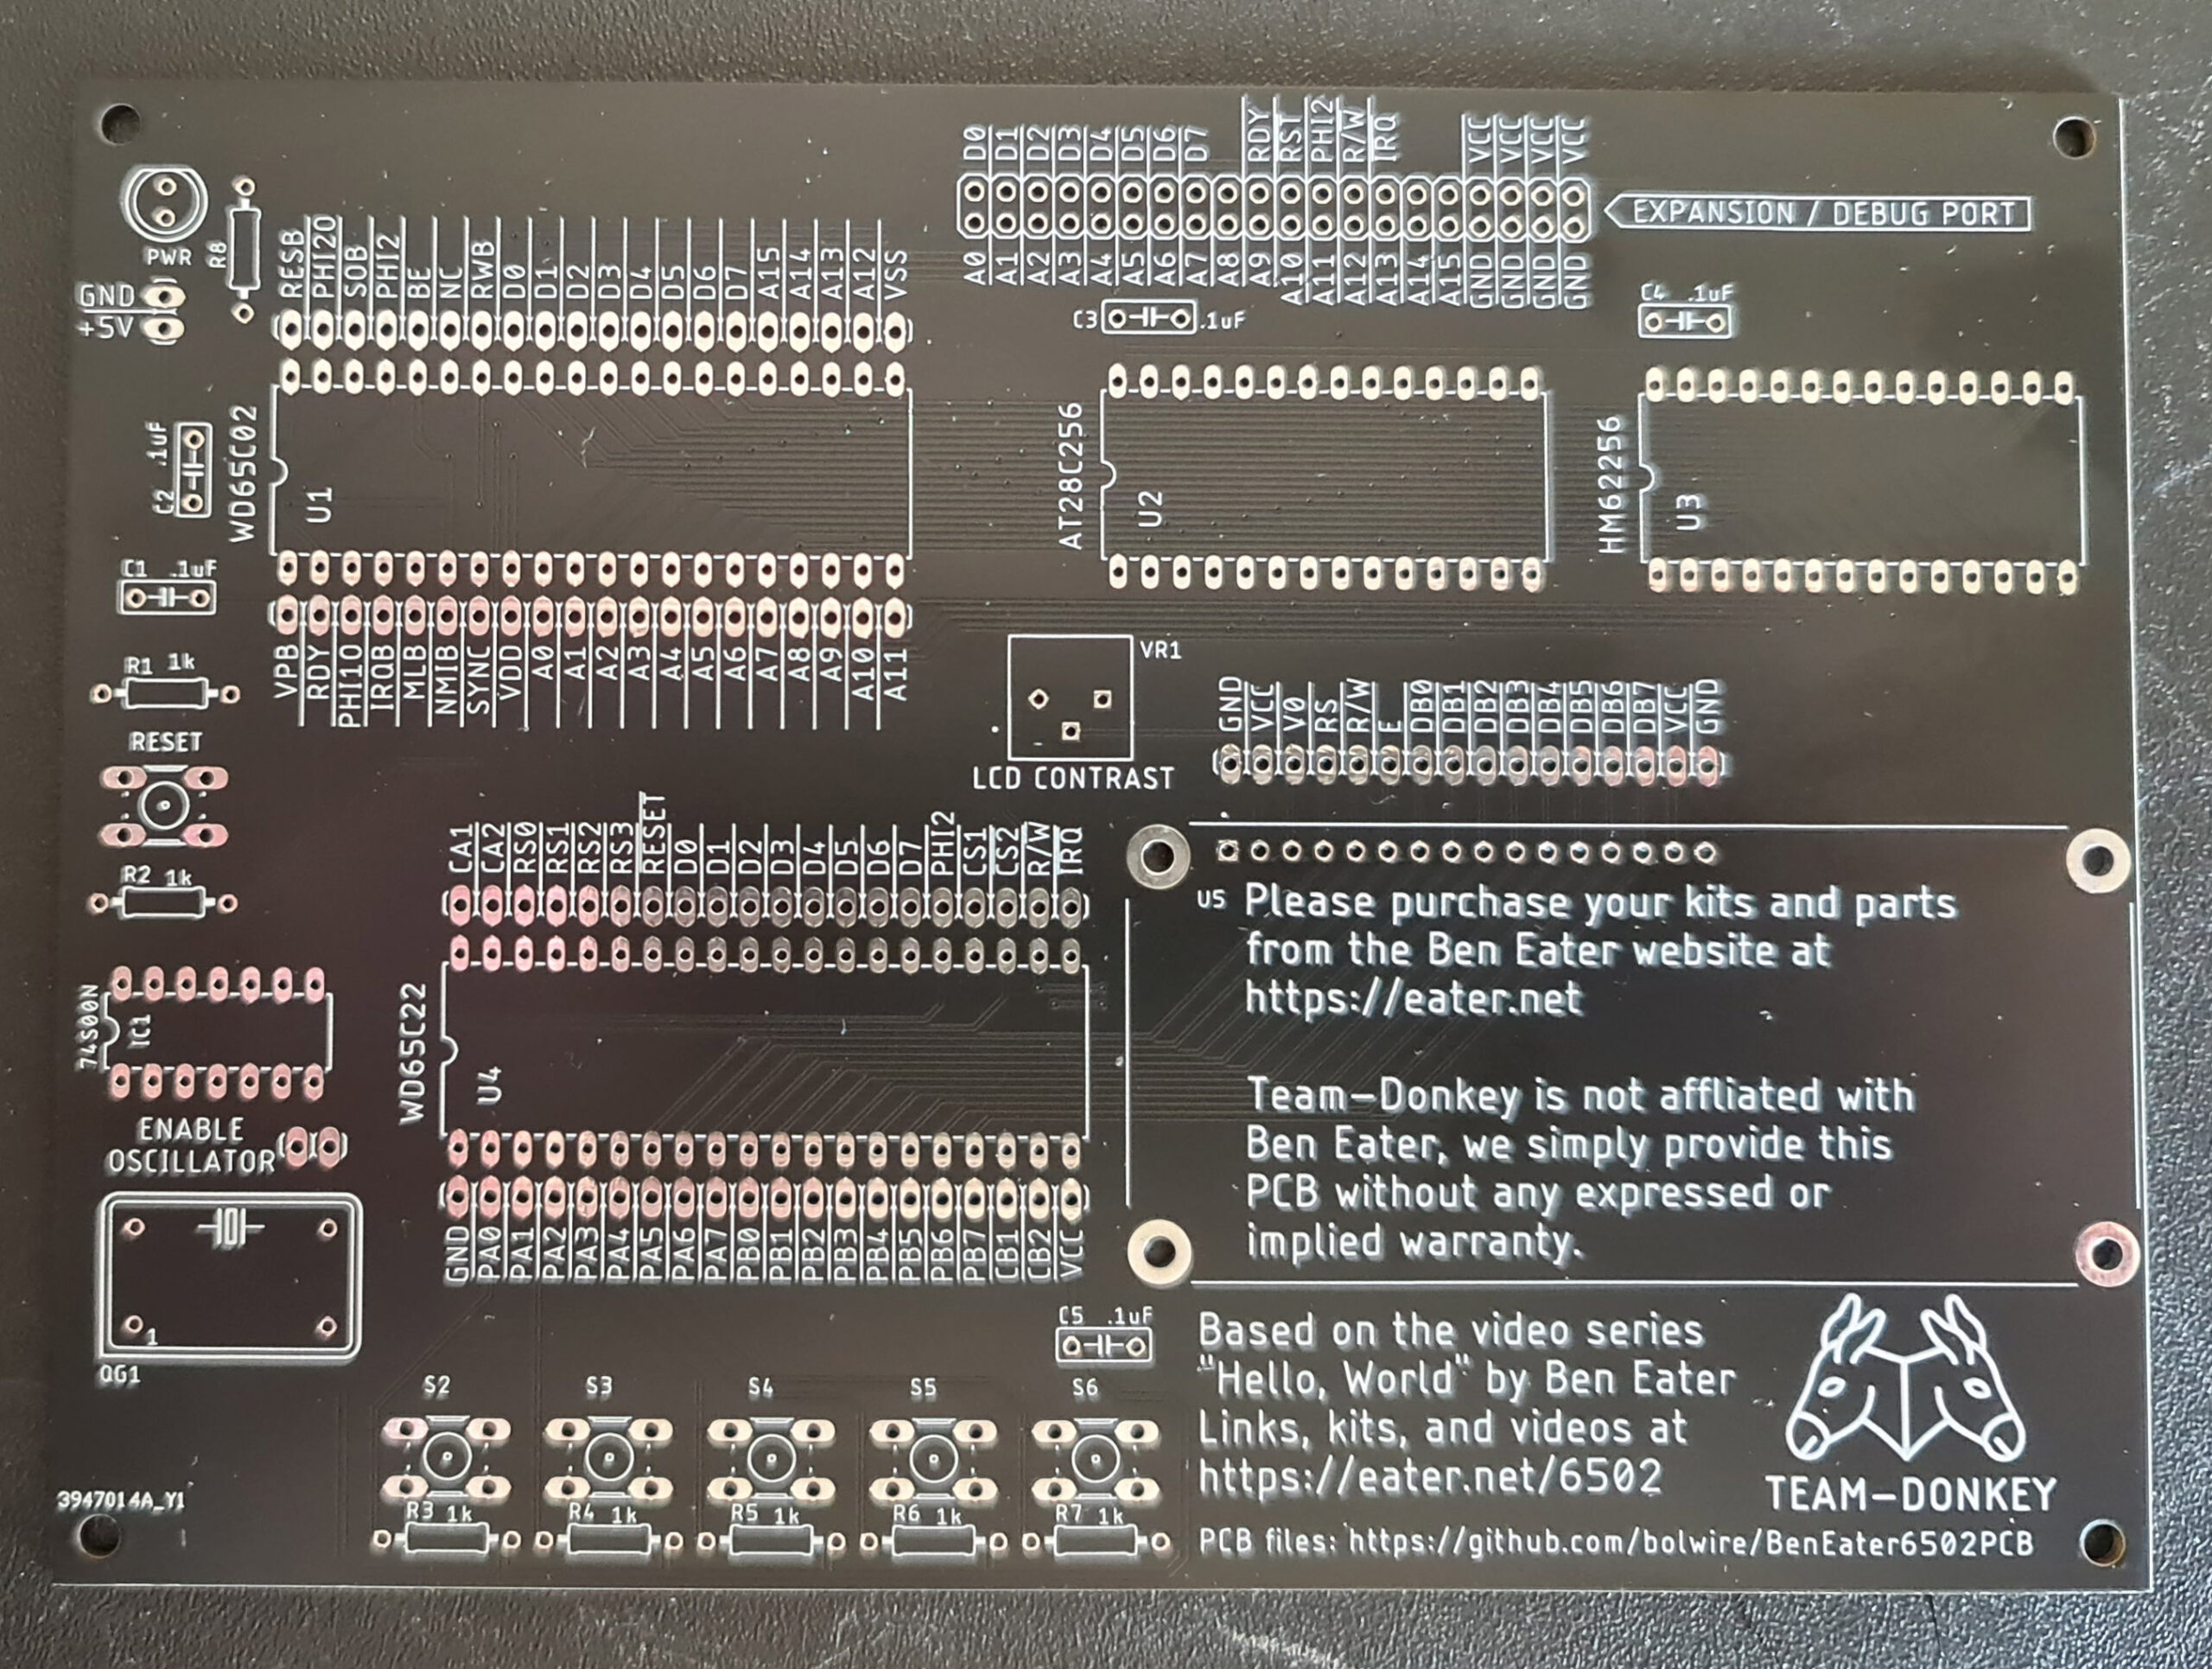
build by bolwire
PCB and EHBasic by mike42
Mike42 has published many blog entries on the 6502 computer he build, starting with a standard Ben Eater design on breadboard.
He then moved to a PCB design, added address decding and added software like the EHBasic interpreter from Lee Davison.
See the blog posts for a well explained and detailed Kicad design and EHBasic adaptation, some posts linked here. He also published on github his PCB design and sources and ROM binaries.
(I would advise to not use the WD65C51, but an older 65(C)51, since the WD part has a serious bug, and the trick to work with it wastes many CPU sycles.

G-Pascal for Ben Eater’s 6502 board
On-board assembler, tiny Pascal, and text editor for Ben Eater’s board.
Nick took the G-Pascal compiler for C64 and Apple II and enhanced it with assembler and line editor for the Ben Eater 6502 board.
To make the software fit in to the 32K ROM he made some hardware enhancements.
Ben Eater’s board suggested hardware modifications

Github with all software and documentation
Includes:
- A 6502 assembler which lets you try out your assembler programming without having to keep removing the EEPROM chip and programming it externally. The assembler supports:
-
The documented WD65C02 instruction set, with all operand modes
-
Full expression evaluation of operands, with operator precedence, parentheses, bitwise operations and so on.
-
Relocation of the output to any memory address (ORG directive)
-
Support for debugging using breakpoints (BRK instruction)
-
Here is “hello world” in assembler:
jmp begin ; skip the message hello asciiz "Hello, world!" begin: lda #<hello ldx #>hello jsr print rts -
Detailed notes about the assembler.
-
- A “tiny” Pascal compiler (G-Pascal) which allows you to program the board in a high-level language. Whilst there are limitations in what can be done in a few KB of memory, the compiler supports:
-
CONST, VAR, FUNCTION and PROCEDURE declarations
-
Local declarations (functions and variables within functions, etc.)
-
Recursive function and procedure calls
-
Arithmetic: multiply, divide, add, subtract, modulus
-
Logical operations: and, or, shift left, shift right, exclusive or
-
INTEGER and CHAR data types. (Integer are 3 bytes and thus range from 8388607 to -8388608)
-
Arrays
-
Interface with any memory address by using the MEM and MEMC constructs (to peek and poke memory locations)
-
Built-in functions to write to the LCD display.
-
Built-in functions to do pinMode, digitalRead and digitalWrite, similar to the Arduino. These interface with any available ports on the VIA chip.
-
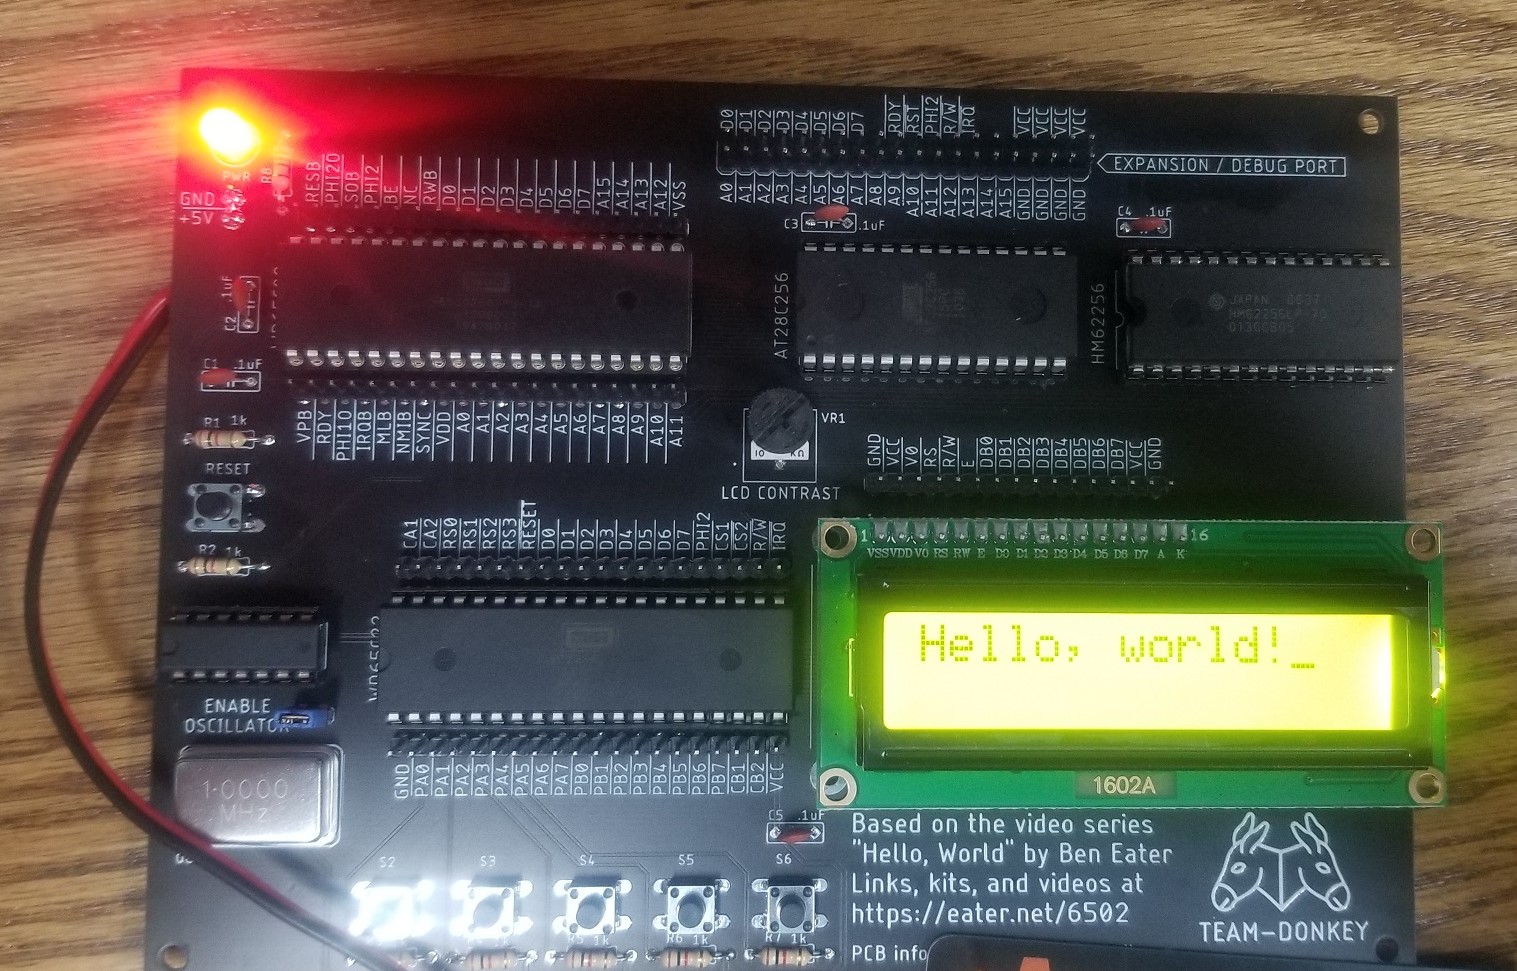
Here is “hello world” for the LCD display:
begin
  lcdclear;
  lcdwrite ("Hello, world!")
end.</code>
And for the serial monitor:
begin writeln ("Hello, world!") end. -
Detailed notes about the compiler .
-
- A text editor for keying in programs. It supports:
- Loading and saving (via the RS232 interface)
- Inserting and deleting lines
- Find and replace
- Detailed notes about the editor and how to load and save source.
Available actions:

List/SAve   line_number_range
Delete      line_number_range
Insert/LOad after_line
Find        line_number_range /target/flags
Replace     line_number_range /target/replacement/flags

Help
INfo
Memory      first_address last_address
Compile/Syntax/Assemble
RUn/DEBug/Trace/RESume
Poke/Jsr/JMp
RECover
(Actions may be abbreviated)
(Flags: 'I'gnore case, 'G'lobal, 'Q'uiet)
- Support functions, such as:
- RS232 interface for connecting a “dumb” terminal, or a PC/Mac
- Support for the LCD interface described in Ben’s videos
- Other support functions for use by your assembler code, such as multiplication and division, CRC calculations, binary-to-decimal conversion
- Support for NMI (non-maskable interrupts) so that you can recover from runaway code
- Support for I2C communication for connecting to real-time clocks, port expanders, etc.
- Support for SPI communication for connecting to port expanders, display boards and other devices.
- There is over 9k of space available on the EEPROM to add your own functions (over 11k if you omit the CP437 character set from it)
Both the Pascal compiler and assembler are quite fast. Any program that will fit into memory will compile in a few seconds. For example, using a 1 MHz clock:
- A 335-line assembler program testing all opcodes assembles in 5 seconds
- A 651-line G-Pascal program (the Adventure game) compiles in 6 seconds