CP/M-65
CP/M-65 is a native port of Digital Research’s seminal 1977 operating system CP/M to the 6502.
Developed by David Given. Ported to many 6502 systems, see the original github archive.
Currently you can cross-assemble programs from a PC, as well as a working C toolchain with llvm-mos. For native development, there’s a basic assembler, a couple of editors, a BASIC, and a byte-compiled Pascal subset and interpreter.
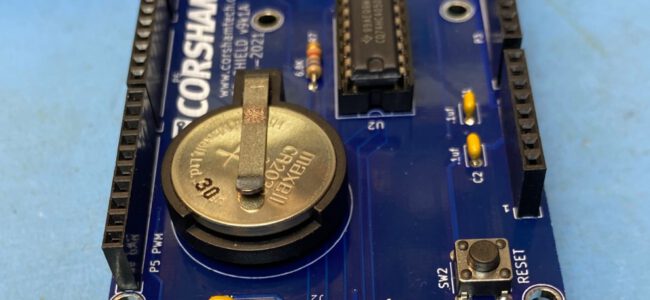
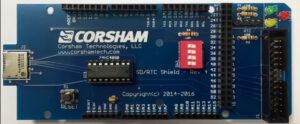
Eduardo Casino ported CP/M-65 to the KIM-1 with an MTU K-1013 FDC, directly connected SD card module, the 1541 drive or Corsham Technology SD CARD/RTC Shield.
And now Eduardo has ported a version special to the KIM-1 Simulator with SD Card/RTC Shield simulation. See his fork of CP/M-65 on his github archive. Several branches are available, development versions with a.o. the KIM-1 Simulator version.
The main changes are to support the KIM-1 Simulator character I/O, using the ACIA simulation instead of low level KIM-1, for non-blocking character input.
How to start CP/M-65
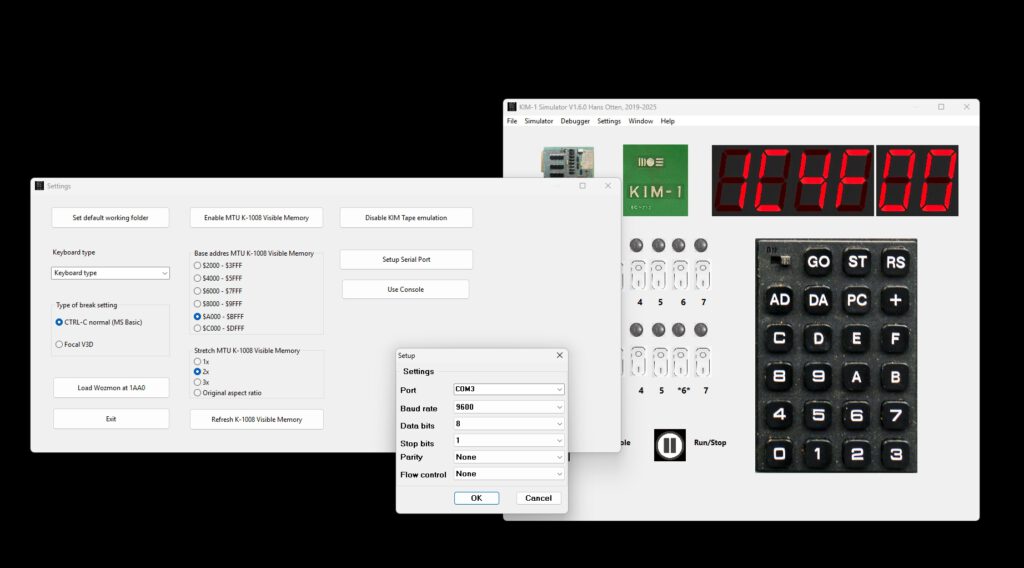
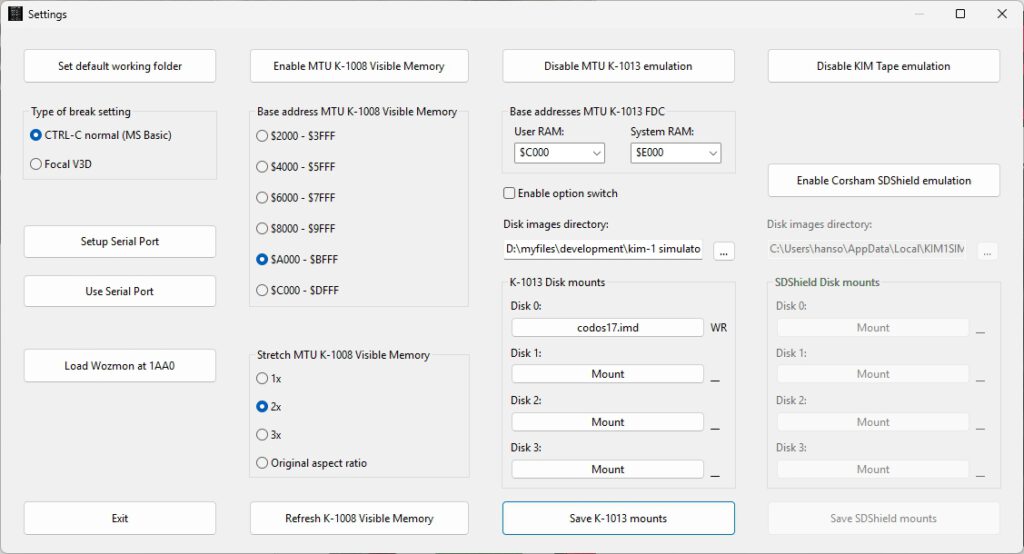
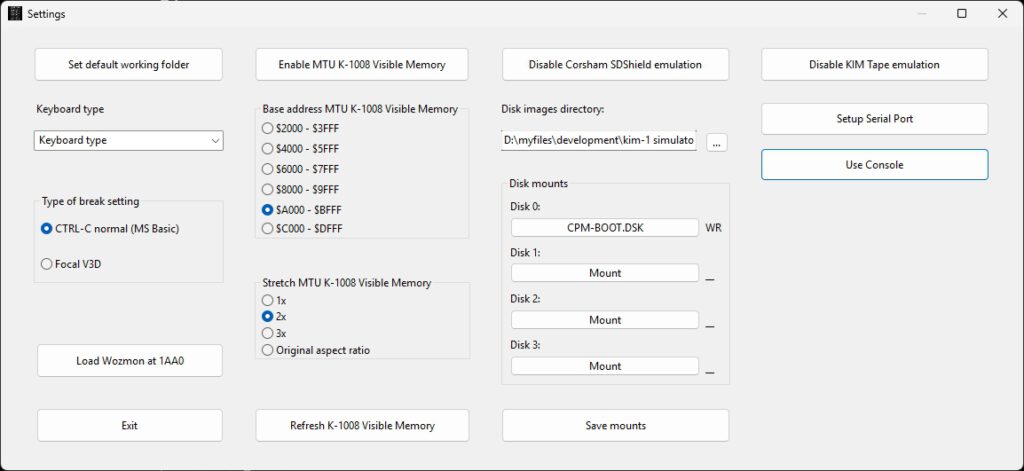
To start using the SD Card/RTC Shield go to the menu settings.

- Enable Corsham SDShield emulation
- Copy the folder from the KIM-1 Simulator setup distribution archive called SDCARD to your disk.
- Choose the Disk images directory pointing to the folder SDCARD. You will see the files on Disk 0 etc filled in, DSK files are for operating systems like CP-M/65
Make sure the first disk mounted is CPM-BOOT.DSK. The DSK files are in the SDCARD folder.
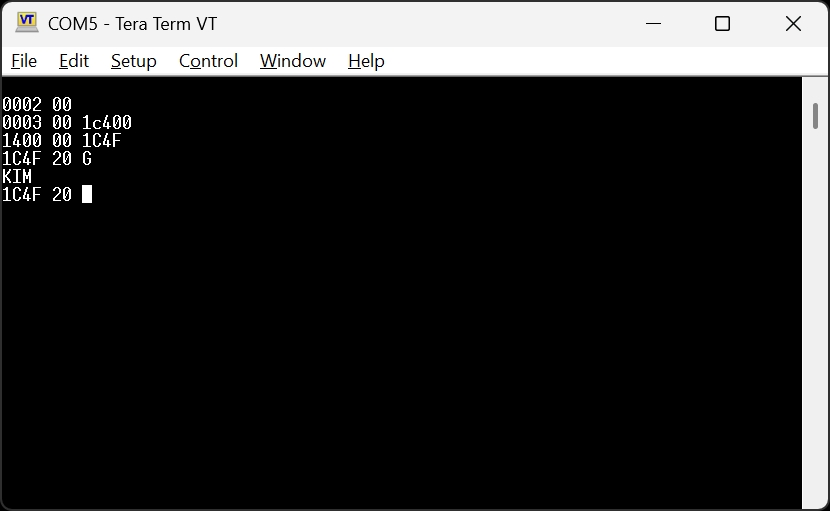
Now you start CP/M-65.
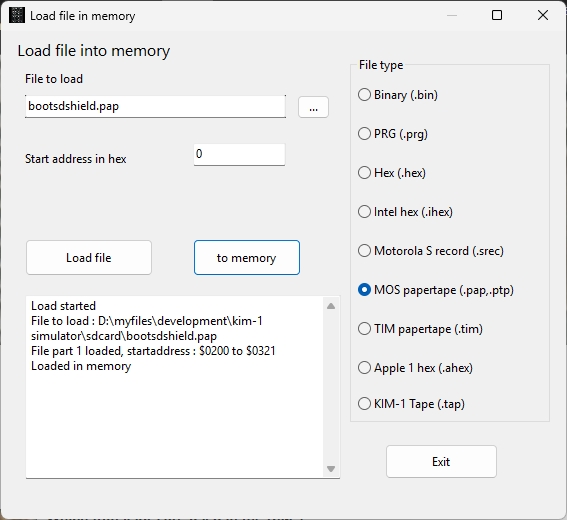
Load the file bootshield.pap into memory with File – Load file in Memory – papertape.
The file is in the SDCARD folder.- Start the console by pressing the TTY Console button on the main window
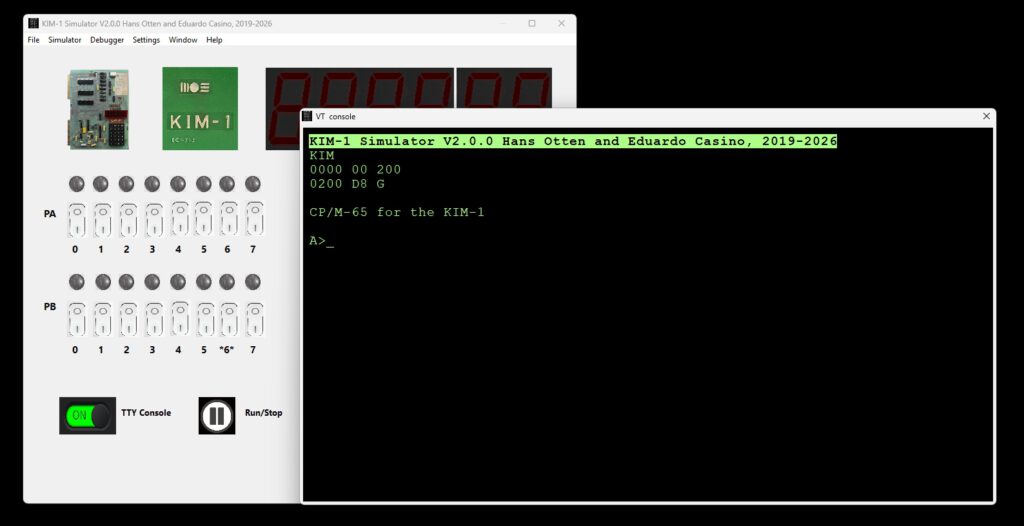
- Start the Simulator by pressing Run/Stop button
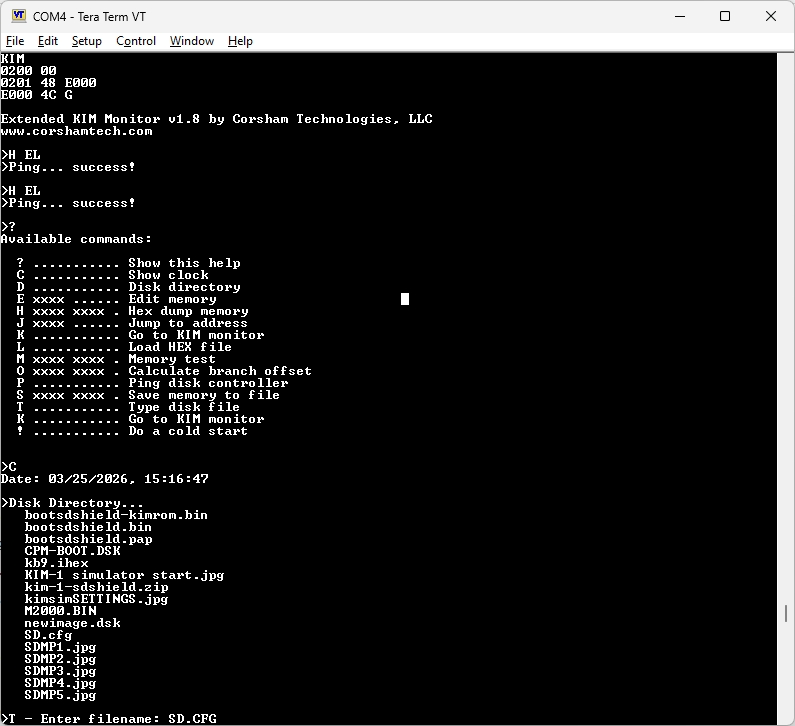
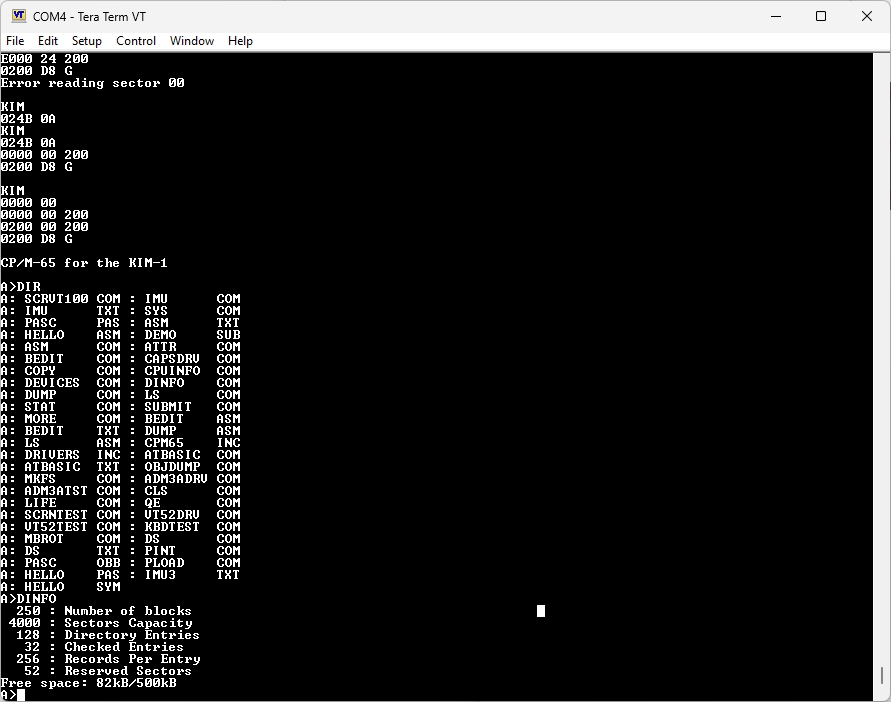
- Start CP/M with
0200 G
and see the CP/M-65 prompt.
Note that this boot program gets overwritten by CP/M-65, so you have to load it again after a reset.

Alternative boot program
In the SDCARD folder you find a second boot program called bootsdshield-kimrom.bin
This one can be placed in the unused 6530-003 ROM area, the same idea as Wozmon for the KIM-1.
The advantage is that this is not overwritten by CP/M-65,
Load at $1AA0, start at $1AA0.
Working with disks
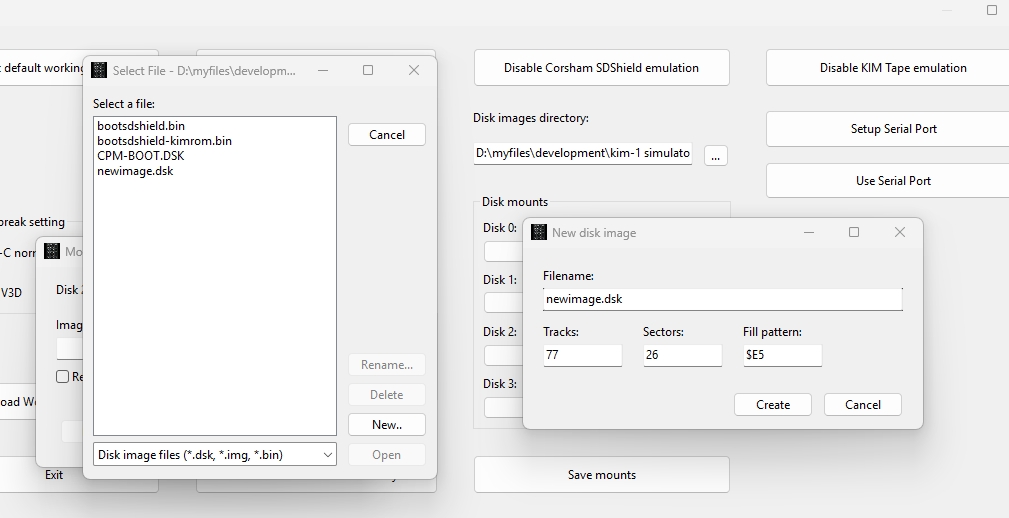
The disks, stored in files with type .DSK are in the SDCARD folder. You can mount/dismount/create disks from the Settings screen.
You can have as many as four.
On the Settings screen the disks mounts are shown. Click on the name of a mounted disk or an empy Mount, to go to the Mount Disk dialog. Mount/Dismount here, in Write or read Only mode.
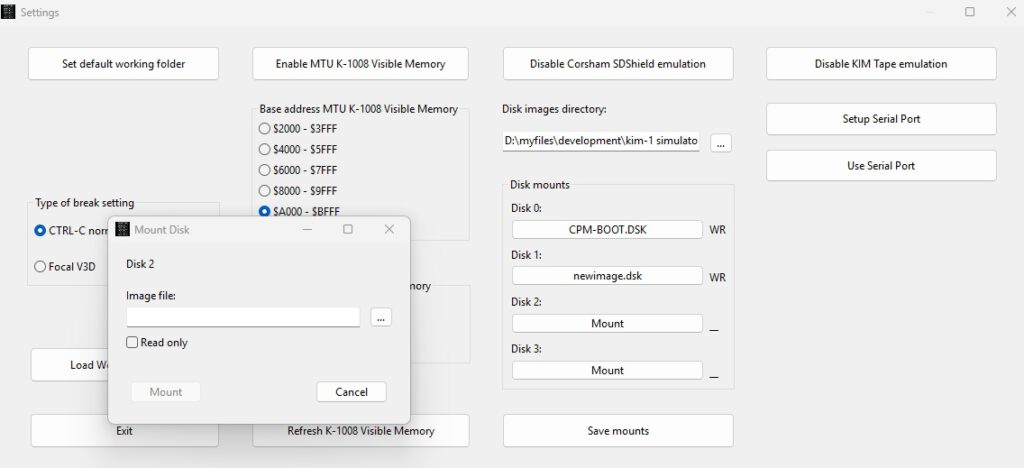
Press the the three … next to the field Image file to select or create a disk image.
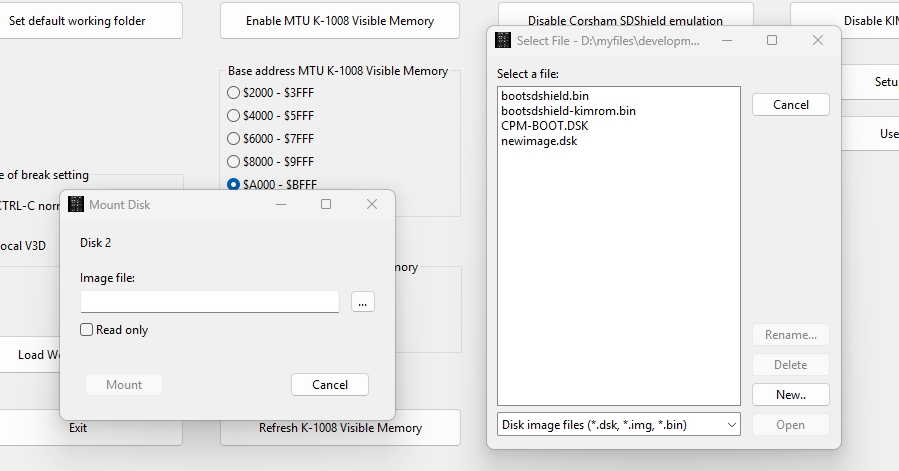
Press New and you get the New diskimage dialog.
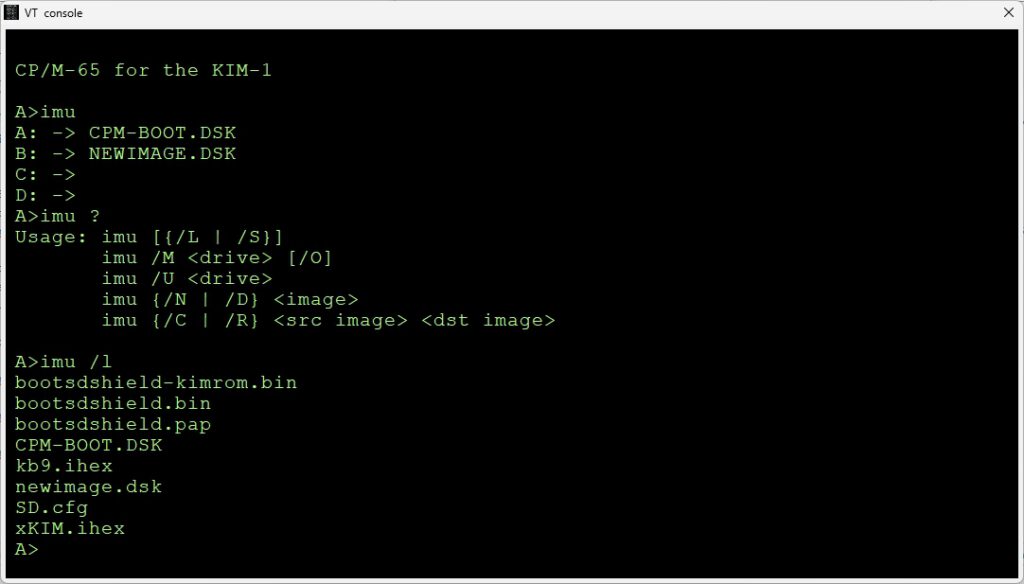
There is also the IMU utility in CP/M-65 to work with disks from within CP/M-65: mount/unmount, list the directory of the SDCARD folder. create/delete and copy.
Example session
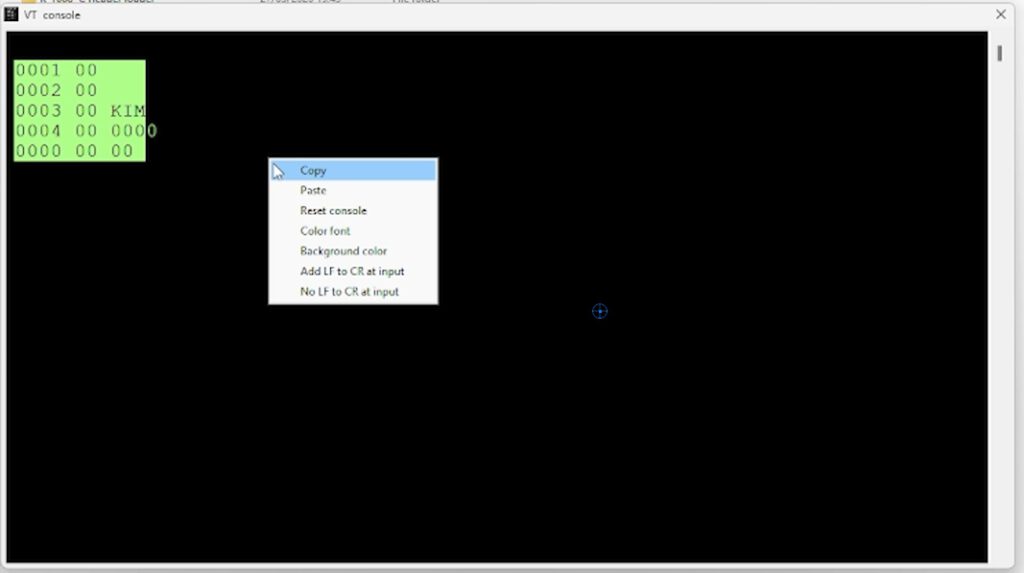
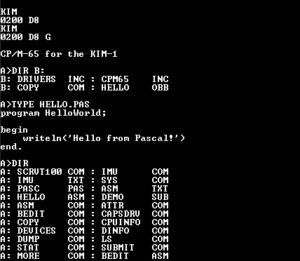
KIM
0200 D8
KIM
0200 D8 G
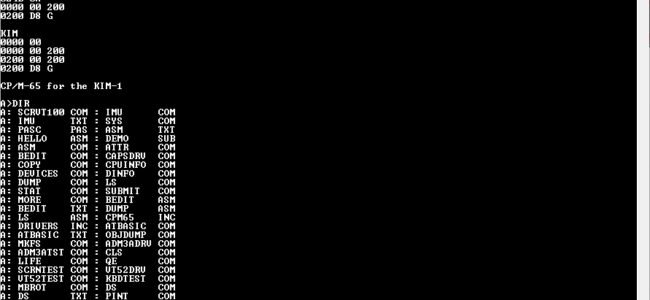
CP/M-65 for the KIM-1
A>dir
A: SCRVT100 COM : IMU COM
A: IMU TXT : SYS COM
A: PASC PAS : ASM TXT
A: HELLO ASM : DEMO SUB
A: ASM COM : ATTR COM
A: BEDIT COM : CAPSDRV COM
A: COPY COM : CPUINFO COM
A: DEVICES COM : DINFO COM
A: DUMP COM : LS COM
A: STAT COM : SUBMIT COM
A: MORE COM : BEDIT ASM
A: BEDIT TXT : DUMP ASM
A: LS ASM : CPM65 INC
A: DRIVERS INC : ATBASIC COM
A: ATBASIC TXT : OBJDUMP COM
A: MKFS COM : ADM3ADRV COM
A: ADM3ATST COM : CLS COM
A: LIFE COM : QE COM
A: SCRNTEST COM : VT52DRV COM
A: VT52TEST COM : KBDTEST COM
A: MBROT COM : DS COM
A: DS TXT : PINT COM
A: PASC OBB : PLOAD COM
A: HELLO PAS : IMU3 TXT
A: HELLO SYM
A>pint PASC.OBB PASC.PAS PASC.OBS
Pascal-M interpreter for CP/M-65: B66F bytes free
Pascal-M compiler V2k1 for CP/M-65
Processing: writeerr
Processing: beginlin
Processing: endline
Processing: error
Processing: stringsi
Processing: nextchar
Processing: insymbol
Processing: enterid
Processing: searchse
Processing: searchid
Processing: getbound
Processing: hexout
Processing: writeout
Processing: bytegen
Processing: wordgen
Processing: genujpen
Processing: plantwor
Processing: skip
Processing: test1
Processing: test2
Processing: intest
Processing: constant
Processing: comptype
Processing: isstring
Processing: simplety
Processing: fieldlis
Processing: typ
Processing: constdec
Processing: typedecl
Processing: vardecla
Processing: paramete
Processing: procdecl
Processing: ldcigen
Processing: ldagen
Processing: lodgen
Processing: condgen
Processing: loadsetc
Processing: cspgen
Processing: incgen
Processing: load
Processing: store
Processing: loadaddr
Processing: falsejum
Processing: calluser
Processing: selector
Processing: variable
Processing: processt
Processing: readproc
Processing: processt
Processing: writepro
Processing: newstate
Processing: releases
Processing: resetrew
Processing: closepro
Processing: assignpr
Processing: getcomma
Processing: ordfunc
Processing: succfunc
Processing: predfunc
Processing: chrfunc
Processing: oddfunc
Processing: eofeolns
Processing: callnons
Processing: call
Processing: opgen
Processing: setexpre
Processing: factor
Processing: term
Processing: simpleex
Processing: expressi
Processing: assignme
Processing: compound
Processing: ifstatem
Processing: casestat
Processing: repeatst
Processing: whilesta
Processing: forstate
Processing: statemen
Processing: body
Processing: block
Processing: stdnames
Processing: enterstd
Processing: enterstn
Processing: enterund
Processing: initiali
Processing: compileh
Processing: compilep
Processing: skipspac
Processing: getword
Processing: findend
Processing: openfile
Processing: closefil
Processing: dumperro
Processing: cpascalm
Compilation successful.
No compilation errors PASC.PAS
A>pload PASC.OBS PASC.OBB
Opening input file...
Opening output file...
Reading OBP...
Seen 94 procedures
Writing output file...
Closing output file...
Success.
A>type HELLO.PAS
program HelloWorld;
begin
writeln('Hello from Pascal!')
end.
A>
A>pint PASC.OBB HELLO.PAS HELLO.OBS
Pascal-M interpreter for CP/M-65: B66F bytes free
Pascal-M compiler V2k1 for CP/M-65
Processing: hellowor
Compilation successful.
No compilation errors HELLO.PAS
B>A:pload A:HELLO.OBS HELLO.OBB
Opening input file...
Opening output file...
Reading OBP...
Seen 1 procedures
Writing output file...
Closing output file...
Success.
B>A:pint HELLO.OBB
Pascal-M interpreter for CP/M-65: B66F bytes free
Hello from Pascal!
B>