When we began building the first of our SS-50 series of cards, the most common request was for a mass storage option. Those old disk controllers are hard to find on the surplus market and the old disk drives are getting harder to maintain. While we like vintage equipment, sometimes it’s worth using some modern technology to do updates.
Enter our SD Card System.
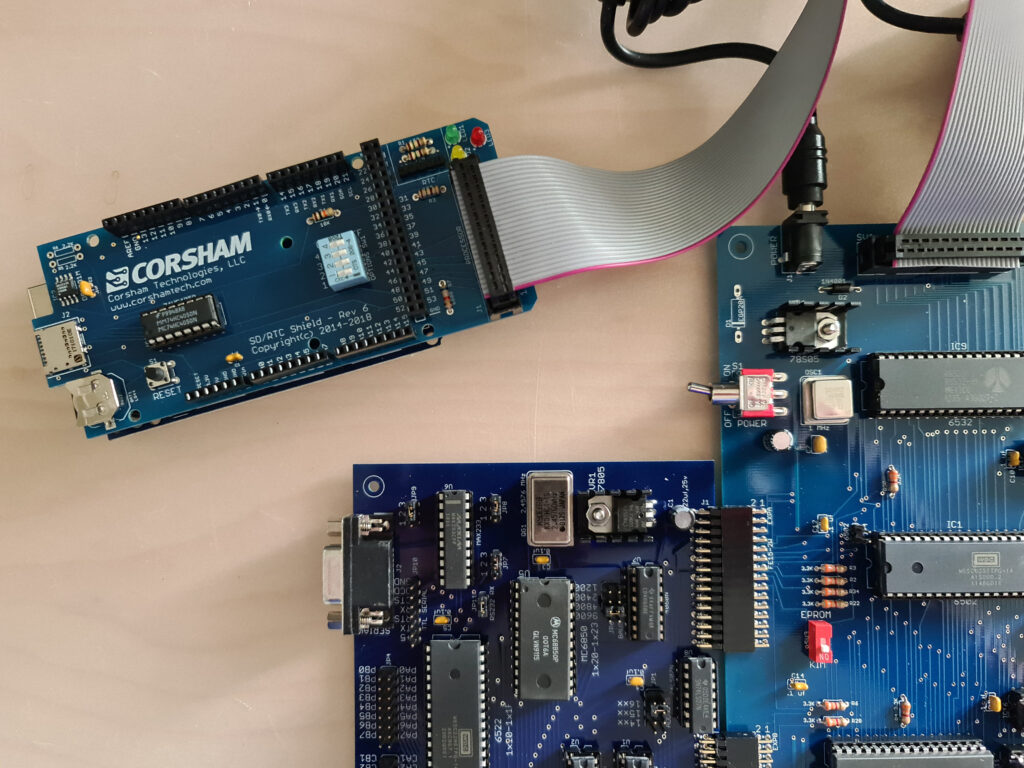
This is a two board system that provides a very inexpensive, flexible, and long-lasting storage option for our KIM Clone , SS-50 based designs, or almost any third party system.
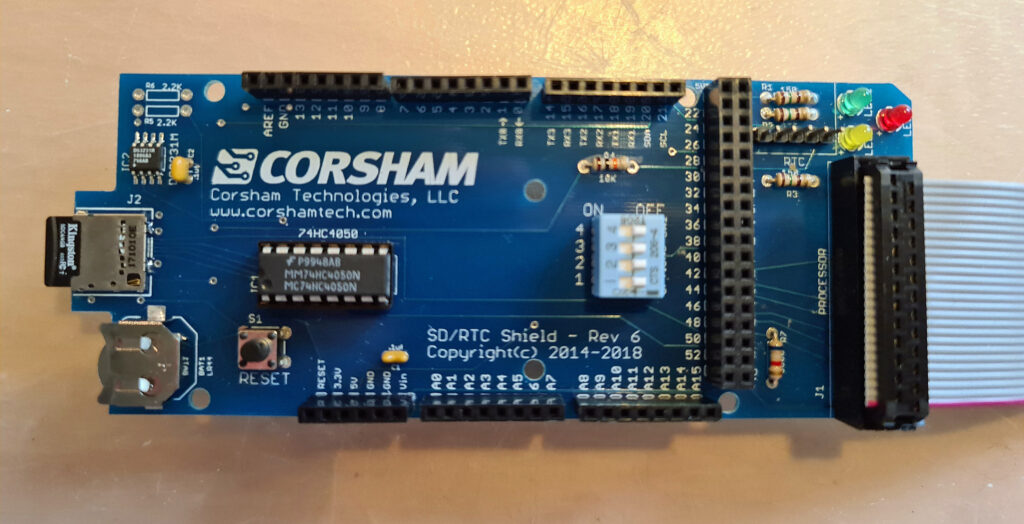
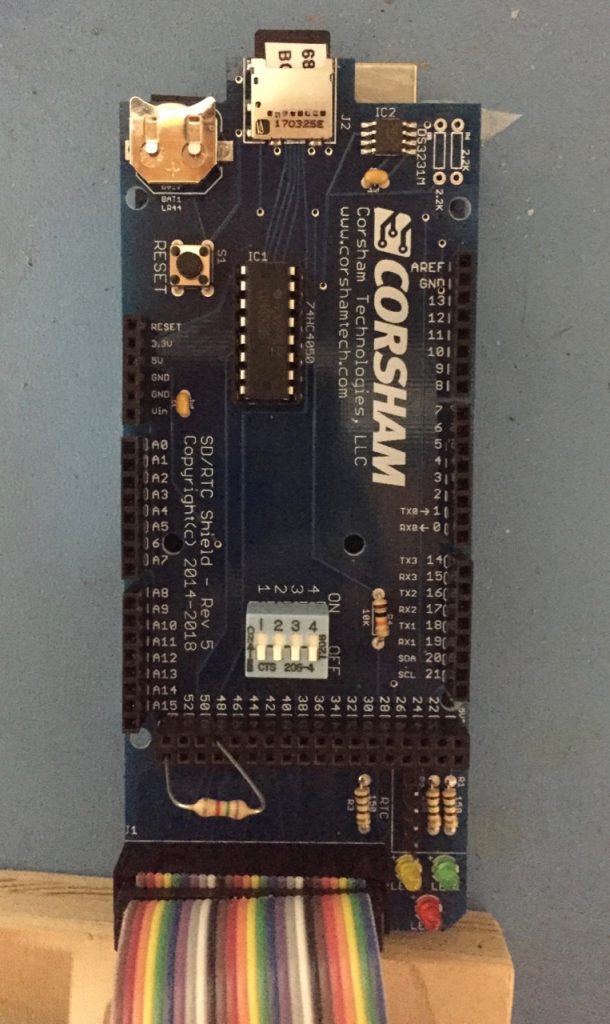
The main board is our SD Shield. It plugs into an Arduino Mega and provides for insertion of a micro SD card, and also includes a DS3231 based real time clock (RTC). The Arduino does the hard work of providing an interface between the host processor (6502, 6800, 6809, etc) and the SD card and RTC. It connects to the host via a ribbon cable.
The board also contains three LEDs used for status, a RESET switch, a four position DIP switch, a DS3231 RTC, backup battery, and it maintains the Arduino Mega headers so additional shields can be placed on top. Since the source code is available you can add additional drivers for whatever shields you add. Want to add an LCD shield that displays which files are mounted? Just plug in the shield and modify the user interface class in the source code. Only one of the DIP switches has a defined purpose, so the rest are free for you to add your own logic.
The protocol between the host and the SD Card System is completely defined in The Remote Disk Protocol Guide.
In order to use this card on an SS-50 based system, you will also need a parallel card such as ours.

 |
SD Card System 2015 |
|
SD Card System 2017 |
|
SD Card System 2021 |
 |
The Remote Disk Protocol Guide August 2015 V0.1 |
 |
The Remote Disk Protocol Guide April 2017 V1.1 |
Downloads
Drivers for 6502, 6800 and 6089 Flex, Arduino Mega Firmware, SD Images Flex, older versions also
Firmware 2021
Test program for SD Shield
Clock utilities set time and date from KIM-1
Reproduction and uptodate SD Shield by Eduardo Casino (Github copy)
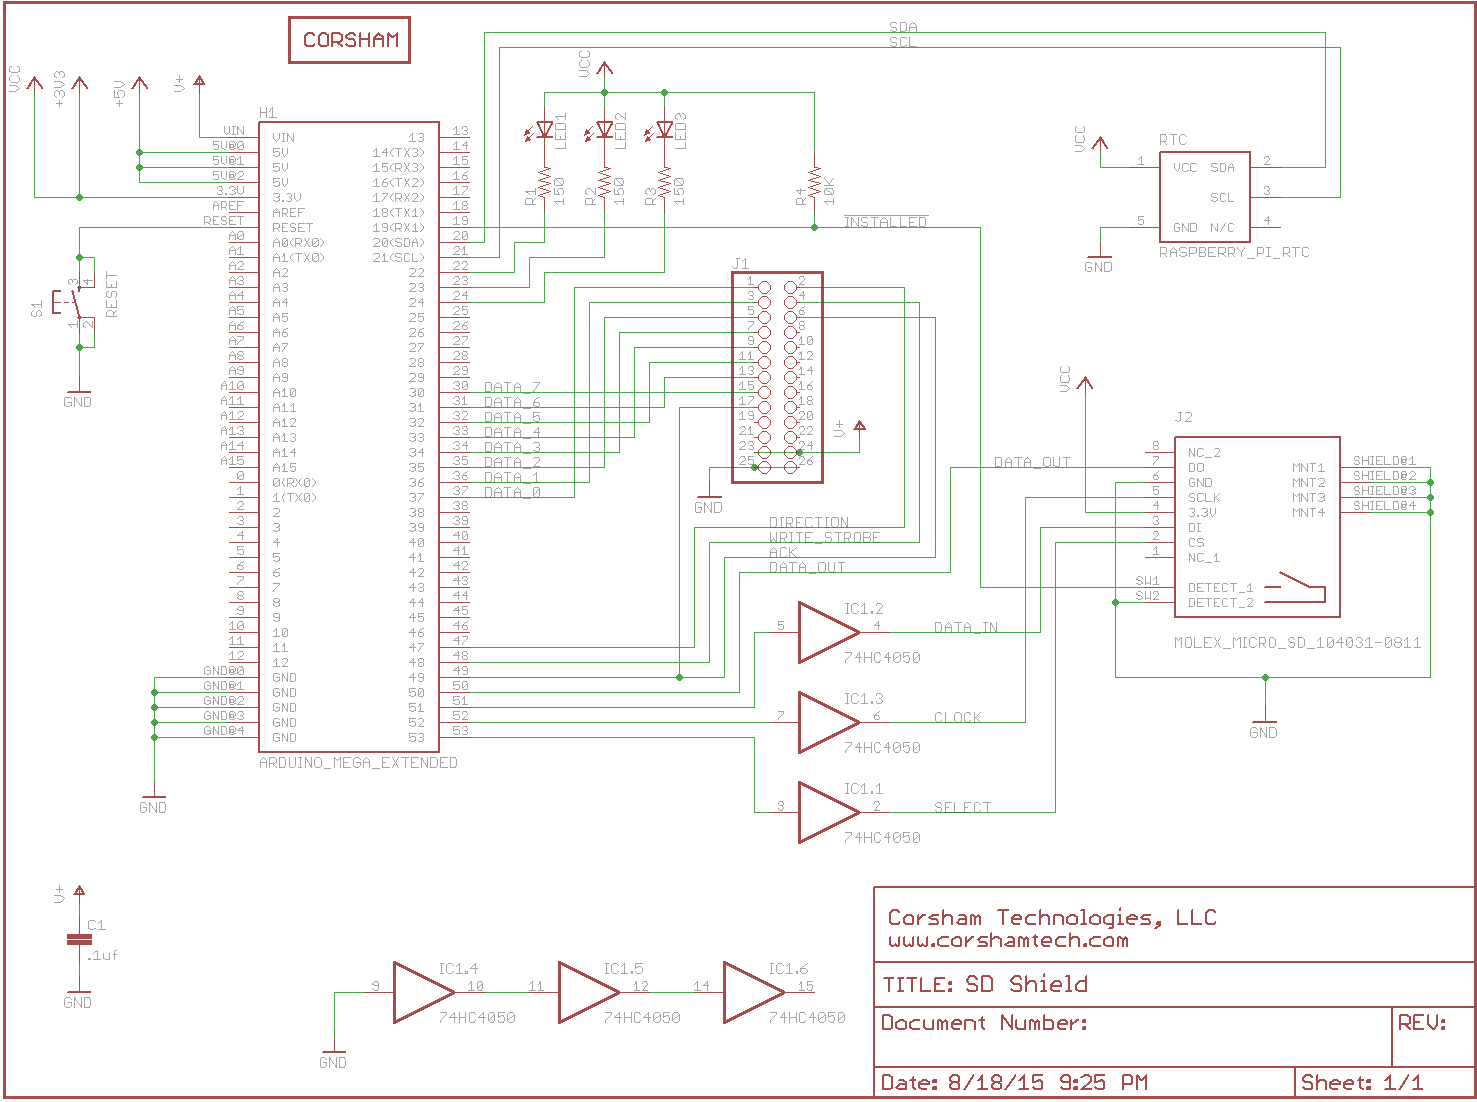
The schematic above is the only version posted. It is not the latest schematic used by Bob (see below). Eduardo Casino (see the download above) reverse engineered the SD Shield and produced an uptodate version 9.

April 5, 2021 New Version of SD Card Shield
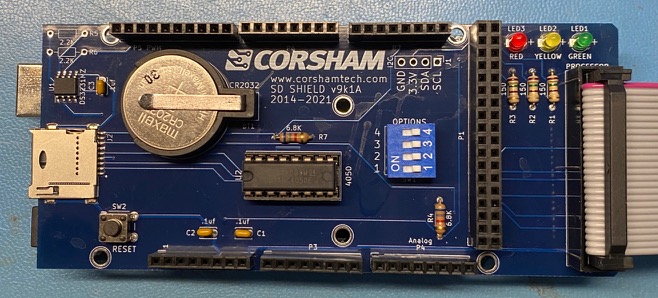
This is another board done entirely with KiCad and rolls in a few changes from the previous boards. It is completely compatible with the rev 8 boards, which were compatible with rev 7, which were compatible with… etc, etc, etc.There is no new revision of Arduino code for this board.
No new features but a few changes:
- The CR1220 battery has been replaced with a much more common CR2032 to keep the RTC (Real Time Clock) chip alive. I did extension market research (ie, I emailed all my nieces and nephews) and found they all had 2032 batteries at home, while none of them had 1220s.My family is used to getting odd emails from Uncle Bob. The local hardware store was surprised when I asked about CR1220s, so going to a more common battery makes sense.
- A different micro SD socket. The old one was push-in, pull-out, but this one is pop-in, pop-out. It also has alignment pins on the bottom making it much easier to get seated exactly in the right spot before soldering. The solder connections are at the back of the socket, not in the front like the old board. So far every surface mount solder job with the new socket has been perfect the first time, whereas the old sockets needing to be touched-up about 15% of the time.
- The old 5-pin header for an external RTC board has been removed, allowing the LEDs to be aligned in a row. With the RTC on-board there was little reason to keep the header.
- Added a clearly labeled 4-pin area for adding external I2C devices.
- For those buying the bare board, the LED colors are labeled on the silk screen. BTW, the “bare board” has the DS3231 RTC and the microSD socket already soldered.

The rev 9k1A will eventually be changed to just rev 9, as there is no need to keep KiCad revisions uniquely identified.
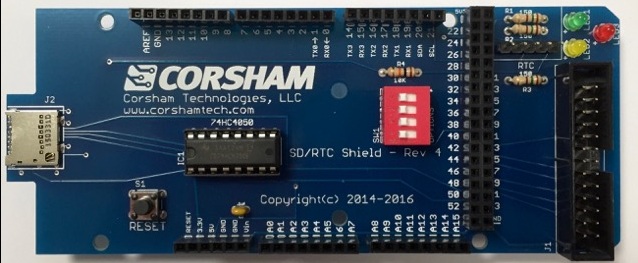
March 21, 2018 What’s On the Bench
Sometimes it’s nice to just enhance an existing product, especially when the supply of blank boards starts running low and more need to be ordered. I’m running low on the SD shields so it was a good time to make some improvements. This is a prototype:
The changes from the Rev 4 boards:
- A DS3231 RTC and backup battery are now on-board instead of having the plug-in RTC.; Too many of those plug-in boards had batteries that died within a year or two, so I decided to just put the chip directly on the board and have a battery connector. It takes a very common LR44 battery which can be replaced easily when it fails.
- DIP switches are clearly labeled as to which is which, and which direction is on and off.
- A pull-down resistor is temporarily added here to fix a problem where the green and red LEDs don’t work right until the host computer initializes the interface to the SD shield. A pin was left floating and confused the software into thinking the host was sending a byte when it wasn’t.
- Two I2C pull-up resistors were added but do not seem to be necessary.
There will eventually be a Rev 6 with the new pull-down resistor and maybe the two pull-ups removed, but I’ll use the current Rev 5 boards and manually add the pull-down for now.
The RTC is completely software compatible with the current boards so any version of our Arduino code will work with it.